Here's what you need to know about the features available for your TPG Voice service, a VoIP phone service that works over your nbn connection.
Note: TPG Voice doesn't have a voicemail feature.
Select one of the links below to jump to a query:
- Call Barring
- Number Display/Number Block
- Directory Listing
- Call Forwarding/Diverting
- Call Waiting
- Caller ID
Call Barring
Call Barring can stop your phone service from making specific types of calls.
All Call Barring types are turned off by default, but you have these options:
- Bar outgoing long distance (STD) calls
- Bar outgoing calls to Australian mobile phones
- Bar outgoing International calls
-
Log in to My Account.
Never used My Account before? Check out An Introduction to My Account. -
Hit View NBN Digital Voice Service Account.

-
Hit NBN Digital Voice Service Control Panel.
-
Under "Call Barring", you can change each type of call barring to barred if you want to turn it on, or not barred if you want to turn it off.

Number Display/Number Block
Number Display/Number Block blocks your phone number from being shown to the person you’re calling.
Number Display/Number Block is turned off by default.
-
Log in to My Account.
Never used My Account before? Check out An Introduction to My Account. -
Hit View NBN Digital Voice Service Account.
-
Hit NBN Digital Voice Service Control Panel.
-
Under "Number Display/Number Block", you can change the option to blocked if you want to turn it on, or displayed if you want to turn it off.

Directory Listing
Directory Listing changes the way your TPG phone number is listed in public directories like the White Pages and Directory Assisted Services:
- Listed: Your name, phone number and address are listed in directories.
- Silenced: Your phone number is not listed in directories.
Directory Listing is set to Silenced by default.
-
Log in to My Account.
Never used My Account before? Check out An Introduction to My Account. -
Hit View NBN Digital Voice Service Account.
-
Hit NBN Digital Voice Service Control Panel.
-
Under "Directory Listing", you can change the option to listed if you want your phone number to be listed in directories, or silenced if you don't want to be in directories.
Any changes may take up to 5 business days to show on directories.
Call Forwarding/Diverting
Call Forwarding lets you divert calls to TPG Voice number to a different Australian phone number. Standard rates apply for all forwarded calls.
Note: You can't forward calls to an international number.
All Call Forwarding/Diverting types are turned off by default, but you have these options:
- Divert all incoming calls
- Divert if no reply (after 4-39 seconds)
- Divert if busy
-
Log in to My Account.
Never used My Account before? Check out An Introduction to My Account. -
Hit View NBN Digital Voice Service Account.
-
Hit NBN Digital Voice Service Control Panel.
-
Under "Call Forwarding/Diverting", enter a destination phone number to turn that type of call forwarding on.
For Divert if no reply, you'll also need to enter a Delay time between 4-39 seconds.
Call Waiting
If someone calls you while you’re already on a call, Call Waiting lets you to put them on hold. To use Call Waiting your phone needs to have a "Recall" of "Flash" button.
Call Waiting is turned on by default and currently, it can't be turned off in My Account.
Caller ID
Caller ID lets you see the phone number of the person who's calling you. It's included by default.
If the phone with yourTPG Mobile SIM got lost or stolen, we can turn on IMEI Blocking so the phone can't be used on any Australian network, except to call emergency services.
Select one of the links below to jump to a query:
How to turn IMEI Blocking on
- Just call us on 1300 997 273. If you're not the account holder, then get the account holder to call us instead.
- Your request may take up to 24 hours to complete.
Note: We also recommend ordering a replacement SIM so you can use your TPG Mobile service in a different phone.
How to turn IMEI Blocking off
If you get your phone back, follow these steps:
- Get your phone's IMEI Number by calling *#06# from your phone. The IMEI Number will be shown on your phone screen.
An International Mobile Equipment Identity (IMEI) Number is a unique code assigned to your phone. It will also be printed on your phone's barcode sticker or the SIM tray, if your phone has one:
- Call us on 1300 997 273. If you're not the account holder, then get the account holder to call us instead.
- Your request may take up to 24 hours to complete.
You need International Roaming turned on to use your TPG Mobile service outside Australia. Here's everything you need to know.
Need help while overseas? You can call us on +61 2 9007 3023 from any phone.
Select one of the links below to jump to a query:
- Important facts about International Roaming
- How to turn on International Roaming
- How to turn off International Roaming
- How to use your mobile service while roaming
- How to call someone who's roaming
- Data charges while roaming
- Call charges while roaming
- SMS/MMS charges while roaming
- Alternatives to International Roaming
Important facts about International Roaming
- International Roaming is turned on by default on all TPG Mobile services sold after 13 September 2023.
- All International Roaming is charged out of your Prepaid Balance. If you don't have enough Prepaid Balance, you won't be able to use your TPG Mobile service overseas until you top up your Prepaid Balance.
- International Roaming is expensive. In addition to higher rates for calls, SMS/MMS and data, you're also charged for receiving calls and MMS. Rates are subject to change - you can look them up on our website.
- You're responsible for all charges accrued by using your mobile service overseas, just like you are when you’re in Australia.
- International Roaming usage info may take up to 48 hours to reach us, which means you won't see up-to-date mobile usage in My Account. To check your usage, just log in and hit Mobile Usage like you would in Australia.
- International Roaming may not be available in some destinations. Mobile data, SMS/MMS, or calls may not work on certain overseas networks, or may not work with your phone because it uses a different frequency.
- Network quality, coverage and capability can vary greatly depending on where you are.
- We recommend using alternatives to International Roaming instead.
How to turn on International Roaming
Important: Make sure International Roaming is turned on before you leave Australia. If you need to turn on International Roaming after leaving Australia, please call us on +61 2 9007 3023 from any phone.
-
Make sure that you understand the rates in your destination.
-
Log in to My Account and hit Settings.
-
Set the International Roaming switch to ON.

-
Hit Enable International Roaming. You'll get an email/SMS to confirm that International Roaming is turned on.
Don't forget to top up your Prepaid Balance to pay for your International Roaming usage.
How to turn off International Roaming
-
Log in to My Account and hit Settings.
Can't log in to My Account? Please call us on +61 2 9007 3023 from any phone. -
Set the International Roaming switch to OFF. You'll get an email/SMS to confirm that International Roaming is turned off.

How to use your mobile service while roaming
-
Once you arrive at your destination, make sure roaming is turned on in your phone settings.
-
If International Roaming is turned on, your phone should automatically connect to a compatible network.
Don't see any network at the top of your phone screen? Try restarting your phone, or follow this guide to manually select a network carrier. Different network carriers will be available in different destinations. -
To make local calls, simply dial the phone number and include any local area codes.
-
To make international calls, including calls to Australia, the dialling code should replace the first zero in the phone number. For example, “08 1234 5678” would be dialled as “+618 1234 5678”.
If the first digit of the phone number is not a zero, then just put the dialling code before the entire phone number. -
To get your voicemail, just dial 121 from your phone.
You can also dial +61414121121 using another phone service and follow the prompts to enter your mobile number and voicemail PIN.
How to call someone who's roaming
If you're in Australia: Just call their mobile number as usual.
If you're also outside Australia: Replace the first zero in their mobile number with the Australian dialling code, +61. For example, “04 0123 4567” would be dialled as “+614 0123 4567”.
Data charges while roaming
While roaming, all data usage is charged in 10kB increments. A data session starts when any internet activity begins on your phone, and ends when:
- you turn your mobile device off;
- turn your mobile data off;
- you switch your phone to flight mode;
- you lose network reception; or
- your phone hasn't sent or received data for a period of time.
| Charges | Zone 1 | Zone 2 | Zone 3 |
|---|---|---|---|
| Data | $0.50 per MB (charged per 10kB) | $1.00 per MB(charged per 10kB) | $15.50 per MB (charged per 10kB) |
Call charges while roaming
While roaming, all calls are all charged in 60-second increments, with a minimum charge of 60 seconds. This charge also applies if you receive a call while roaming, as it covers the cost of re-routing the call from Australia.
Rates vary according to the Zone you're in, which you can look up on our website.
You won't be charged if you don't answer an incoming call.
| Charges per 60-second increment | Zone 1 | Zone 2 | Zone 3 |
|---|---|---|---|
| Make and receive a call | $1.00 | $2.00 | $4.00 |
| Access Voice Mail 121 or +61 414 121 121 | $1.00 | $2.00 | $4.00 |
| Call TPG Support on +61 2 9007 3023 | $0.00 | $0.00 | $0.00 |
SMS/MMS charges while roaming
Rates vary according to the Zone you're in, which you can look up on our website.
SMS are the original text message, while MMS includes multimedia like pictures and video.
| Charges | Zone 1 | Zone 2 | Zone 3 |
|---|---|---|---|
| Sending an SMS | $0.50 | $1.00 | $1.00 |
| Receiving an SMS | $0.00 | $0.00 | $0.00 |
| Sending an MMS | Standard Domestic MMS rate + $0.50 per MB | Standard Domestic MMS rate + $1.00 per MB | Standard Domestic MMS rate + $15.50 per MB |
Alternatives to International Roaming
- Local SIM: If your phone is unlocked, you can buy a SIM from a local mobile provider when you arrive at your destination.
- Travel SIM: You can buy a Travel SIM to use overseas, and some Travel SIMs may let you to pay with Australian dollars. If you're buying a Travel SIM, make sure there's enough time for the SIM to be delivered before you leave Australia.
- Wi-Fi: You can use the internet over Wi-Fi without using your mobile data. To stop mobile data being used, turn off mobile data in your phone settings. Apps like Skype and WhatsApp can also be used to make calls and send messages over Wi-Fi.
If you're having trouble with SMS or MMS on your TPG Mobile service, these steps will help you identify the issue.
SMS are text messages, while MMS includes multimedia like images and videos.
Select one of the links below to jump to a query:
Can't send any SMS or MMS
-
Your service may just be affected by an outage or planned maintenance. You can check our Network Status page.
If there is an outage or planned maintenance, the results will give you an estimated fix time. -
Even if you're in the TPG mobile coverage area, certain locations may have a weak mobile signal, like basements, underground tunnels, or large shopping centres.
Try sending an SMS/MMS while outside. -
Are you trying to SMS/MMS an international mobile number? Some international mobile networks just don't support SMS/MMS. If this is the case, you'll need to use an instant messaging app like Messenger, or email.
If you know that SMS/MMS works in the destination you're sending it to, then check how the mobile number is dialled or saved in your mobile contacts:
- The dialling code should replace the first zero in a mobile number. For example, a London mobile number "07937123123" should be "+447937123123".
- If the first digit of the mobile number is not a zero, then just put the dialling code before the entire mobile number. -
If your handset displays an error message like "No Network", "No Service" or "Select Network", follow this guide to manually select your carrier.
Try sending another SMS/MMS after your carrier is selected. -
Make sure your phone settings have the SMSC (Short Message Service Centre) or MCN (Message Centre Number) set to "+61415011501".
If you can't find your phone in the Vodafone device guides, check the manufacturer's website or run a Google search for a guide on how to do this. -
Do you have another phone that fits your TPG SIM? If you can send SMS/MMS on one phone but not another, the phone that can't send SMS/MMS may be damaged or faulty.
Faulty phones need to be repaired or replaced. Contact the seller for a warranty claim. -
Still can’t send SMS? Call us on 1300 993 019 and we'll help you out.
If you can send SMS but not MMS, try the steps below.
Can't send MMS
If you can send SMS but MMS isn't working, try these steps:
-
Make sure the MMS file size, especially video MMS, doesn't exceed the file size limit allowed by your phone.
You'll usually get a popup on your phone telling you if the file is too big. -
Make sure mobile data is turned on in your phone settings. If mobile data is off, MMS may not work properly.
Check the manufacturer's website or run a Google search if you're not sure how to do this on your phone. -
Make sure your phone has the following MMS settings:
APN: live.vodafone.com
MMSC: http://pxt.vodafone.net.au/pxtsend
MMS Proxy: 10.202.2.60
If you can't find your phone in the Vodafone device guides, check the manufacturer's website or run a Google search for a guide on how to do this. -
Still can’t send MMS? Call us on 1300 993 019 and we'll help you out.
TPG Mobile APN settings
Most phones will automatically detect your APN based on your SIM, and you won't need (or be able) to adjust these settings.
If your phone asks you to choose from a list of providers, pick Vodafone.
- Name: VF WEB
- APN: live.vodafone.com
- APN type: default
- MCC: 505
- MNC: 3
TPG Mobile MMS settings
Most phones will automatically detect your MMS settings based on your SIM, and you won't need (or be able) to adjust these settings.
- Name: Vodafone AU-MMS
- APN: hos
- APN type: mms
- MMSC: http://pxt.vodafone.net.au/pxtsend
- MMS Proxy: 10.202.2.60
- MMS Port: 8080
- MCC: 505
- MNC: 3
If you're having trouble with calls on your TPG Mobile service, these steps will help you identify the issue.
Select one of the links below to jump to a query:
Can't make or receive any calls
-
Your service may just be affected by an outage or planned maintenance. You can check our Network Status page.
If there is an outage or planned maintenance, the results will give you an estimated fix time. -
Even if you're in our TPG mobile coverage area, certain locations may have a weak mobile signal, like basements, underground tunnels, or large shopping centres.
Try making a call while outside. -
Make sure that Flight Mode or Airplane Mode is turned off:
- On Android phones, use two fingers to swipe down from the top of the screen and then tap the Flight Mode icon to turn it on or off.
- On iPhones, swipe down from the top right of the screen and then tap the Airplane Mode icon to turn it on or off.

-
Make sure that Do Not Disturb mode is turned off:
- On Android phones, please follow this guide from Google Support.- On iPhones, please follow this guide from Apple Support.
-
Log into My Account and hit Settings, then the plus (+) icon next to Call Barring. Make sure that Bar All Outgoing Calls is turned off.
-
Turn your phone off, wait two minutes, and then turn it on again. After your phone has restarted, try making a call again.
-
Does your phone show a message like "No Network", "No Service" or "Select Network"? Follow this guide to manually select your carrier.
-
Does your phone show "Line 2"? Hold the # key on your phone until a message like “Change Phone Line” comes up on the screen, and then hit OK.
If this doesn't work, check the manufacturer's website for a guide on how to turn off Line 2.
Line 2 is a feature like Call Waiting that is used by some international networks, but it doesn't work in Australia and it will stop you from making calls. -
Do you have another phone that fits your TPG SIM? If you can make calls on one phone but not another, the phone that can't make or calls may be damaged or faulty.
Faulty phones need to be repaired or replaced. Contact the seller for a warranty claim. -
Still can’t make calls? Use another phone to call us on 1300 993 019 or contact us on Live Chat and we'll help you.
Can’t make International calls
If you can call local or Standard National numbers but you can’t call International numbers, try these steps:
- Log into My Account and hit Settings, then the plus (+) icon next to Call Barring. Make sure that Bar All Outgoing International Calls is turned off.
- Make sure that the number is dialled correctly:
- The dialling code should replace the first zero in a mobile number. For example, a London mobile number "07937123123" should be "+447937123123".
- If the first digit of the mobile number is not a zero, then just put the dialling code before the entire mobile number. - Make sure that the number you’re calling isn’t for a High Risk Calling Destination as these are blocked by default.
If you need to call a high risk destination, please call us on 1300 993 019. - Some TPG Mobile plans have a monthly quota for International Minutes, or only include International calls for select destinations.
You can check your International Minutes in My Account by selecting Mobile Usage.
If you’ve used all your International Minutes or you’re trying to call a destination that isn’t included in your TPG Mobile plan, you can Top up your Prepaid Balance to make the call at standard rates.
Can’t make premiums calls
Calls to premium numbers starting with 19, 1900, 1901 or 1902 aren't available on TPG Mobile. There is no way to make these calls.
If your Wi-Fi connection is having dropouts, it means that your Wi-Fi will lose connection intermittently while devices connected to your modem by Ethernet cable will stay connected. These steps will help you identify the issue.
-
Turn off your Wi-Fi devices off for at least 60 seconds, then turn them back on again.
You can use a Restart option if your device has one. -
Find your Wi-Fi modem and turn off its power outlet for at least 60 seconds.
-
Turn the outlet back on and wait for your modem’s Internet light to come on, then see if your Wi-Fi drops out again.

-
When your Wi-Fi drops out, make sure that laptop, phone or tablet is still connected to your Wi-Fi network. You may need to move closer to your modem because your device will automatically disconnect if the Wi-Fi is out of range.
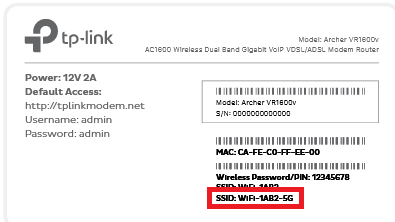
If you need to connect a device to your Wi-Fi network again, you'll find the default Wi-Fi name (SSID) and password on your modem's barcode sticker.
Do you have a custom Wi-Fi name or password? Our basic Wi-Fi settings guide for TPG modems will help you change your Wi-Fi details. If your modem isn't from TPG, you should be able to find help on the manufacturer's website.
-
If your Wi-Fi only drops out in certain parts of your home, check out our guide on improving Wi-Fi signal.
-
Do you have multiple devices connected to your Wi-Fi? If some devices get Wi-Fi dropouts in the same location while others don't, the devices that gets dropouts may have a faulty wireless adapter.
Devices with a faulty wireless adapter may need to be repaired or replaced. If the device is a computer running Windows, a winsock reset may help. -
Still can't connect to the Wi-Fi? If you have a TPG modem, please call us on 13 14 23 and we'll help you out.
If you have a third-party modem, please check the manufacturer's website for support.
If your Wi-Fi connection is down, it means that devices connected to your modem by Ethernet cable will still be able to get online while devices on Wi-Fi can't. These steps will help you identify the issue.
-
Make sure that Wi-Fi isn't turned off on your laptop, phone or tablet.
Some laptops have a Wi-Fi switch or button that may have been pressed accidentally. Phones and tablets will have an option to turn off Wi-Fi in their Wi-Fi settings.
-
Make sure that Wi-Fi isn't turned off on your modem.
Some modems have a Wi-Fi button that may have been pressed accidentally.
-
Make sure that laptop, phone or tablet is still connected to your Wi-Fi network. You may need to move closer to your modem because your device will automatically disconnect if the Wi-Fi is out of range.
If you need to connect a device to your Wi-Fi network again, you'll find the default Wi-Fi name (SSID) and password on your modem's barcode sticker.
Do you have a custom Wi-Fi name or password? Our basic Wi-Fi settings guide for TPG modems will help you change your Wi-Fi details. If your modem isn't from TPG, you should be able to find help on the manufacturer's website. -
If you only lose your Wi-Fi connection in certain parts of your home, check out our guide on improving Wi-Fi signal.
-
Do you have multiple devices connected to your Wi-Fi? If some devices can connect but others can't, the devices that can't connect may have a faulty wireless adapter.
Devices with a faulty wireless adapter may need to be repaired or replaced. If the device is a computer running Windows, a winsock reset may help. -
Still can't connect to the Wi-Fi? If you have a TPG modem, please call us on 13 14 23 and we'll help you out.
If you have a third-party modem, please check the manufacturer's website for support or contact the seller for a warranty claim.
There are two ways to connect your device to your modem so it can use the internet: Ethernet cable, or Wi-Fi.
Wi-Fi uses radio waves to transmit data, and a typical indoor Wi-Fi signal has a range of 30 metres. However, your Wi-Fi range and signal strength can change based on several factors.
This guide will explain how you can get the best Wi-Fi signal in your home.
Select one of the links below to jump to a query:
- Find the best spot for your modem
- Make sure you’re using the best Wi-Fi bands
- Check how old your devices are
- Other hardware solutions for your home network
Find the best spot for your modem
- Putting your modem in a clear, central location in your home will help the Wi-Fi signal reach the most rooms.
- It’s best to put your modem on a desk or shelf - being low to the ground can weaken your Wi-Fi signal.
- Obstacles like walls, floors and ceilings will reduce Wi-Fi signal a bit, but large pieces of metal and liquids will reduce it more. Keep your modem away from large appliances like fridges or microwaves, fish tanks and hot water systems.
- Make sure your modem has air flow around it – if it’s crowded with other devices, it could overheat.
- Don’t shut your modem in a cupboard. You can tape over the modem’s lights if they bother you.
Can’t move your modem?
If you need to keep your modem in a certain spot due to a 4G/5G wireless signal or available power outlets, some extra hardware may help your home network.

Make sure you’re using the best Wi-Fi bands
Wi-Fi uses different radio frequencies, known as “bands”. Modems typically have both 5GHz and 2.4GHz bands, and the latest modems may also have 6GHz.
- 2.4GHz: Slower speeds with a longer range. Used by lots of other devices like baby monitors and microwaves, so it can have more interference.
- 5GHz: Faster speeds with a shorter range. Less interference because older devices don’t use it.
- 6GHz: Fastest speeds with a similar range to 5GHz. The least interference because it’s the newest technology.
Most current modems have a feature called “Band Steering”, which will automatically connect to the best Wi-Fi band in range. So if you walk out of 5GHz range, it will switch your phone to 2.4GHz to keep connected but your speed will be slower.
If your modem doesn’t have Band Steering, you’ll need to choose which Wi-Fi band to connect to.
An easy way to check is to look at the modem’s barcode sticker – if you see 2 different WiFi network names, or “SSID”s, and one has “5G” in it, that’s the one you need to connect to for 5GHz.
Got an iiNet modem with custom Wi-Fi details? Our Basic Wi-Fi Settings guide will help you check the name of the 5GHz Wi-Fi network.
Check how old your devices are
Newer devices support the latest generation of Wi-Fi – for example, a Wi-Fi 6 device will perform better than Wi-Fi 4.
If your device if less than 5 years old, no worries – but if it’s older, it’s a good idea to look up what Wi-Fi it supports.
Even if you can’t upgrade to a newer device right now, the other advice in this guide could still help your Wi-Fi performance.
- Older modems that only have Wi-Fi 4 or 5 won’t be as fast as newer modems with Wi-Fi 6 or 7.
- Older modems may not have a Band Steering feature, so connected devices won’t switch Wi-Fi bands automatically. Devices on the 5GHz band may drop out if you go out of range.
- Newer modems are backwards-compatible with older Wi-Fi generations, so older devices can still connect but performance will be limited.
- Older devices may not be able to connect to the latest Wi-Fi. You could have a modem that goes up to Wi-Fi 6, but if your device only supports Wi-Fi 4, performance will be limited to Wi-Fi 4, too.
Other hardware solutions for your home network
- Always connect a device with an Ethernet cable if you can
It means there’s more bandwidth available for the devices that have to use Wi-Fi. When more devices are competing to use the Wi-Fi at the same time, it can cause performance issues.
- Keep an eye on how many Wi-Fi devices you have
If you have so many devices using your Wi-Fi that it’s causing performance issues, a quick fix is simply to turn the unimportant devices off. You may have more devices connected than you think - if you log into your modem settings using the details on its barcode sticker, you should be able to find a list of all connected devices.

- Consider internal Ethernet wiring
Also known as “smart wiring”, this is a serious investment for people who want to have Ethernet wall sockets in different rooms to connect their devices. It must be installed by a registered cabler.
- A Wi-Fi mesh network can boost your Wi-Fi signal
You can have one or more Wi-Fi mesh devices placed in different rooms. They’ll connect with your modem and each other to relay your Wi-Fi signal from multiple points, reducing “dead spots” in your Wi-Fi coverage.
Here's everything you need to know about TPG Fibre to the Building (FTTB) services on the Vision network.
Select one of the links below to jump to a query:
- Where is TPG FTTB available?
- How is TPG FTTB connected?
- What do I need for TPG FTTB?
- How does TPG Voice work?
- How long does it take to get connected to TPG FTTB?
- Can I use smart wiring with TPG FTTB?
- Will my medical alarm, security alarm, EFTPOS machine or fax machine work on TPG FTTB?
Where is TPG FTTB available?
TPG FTTB is available in select buildings nationwide. You can check your address on our website.
How is TPG FTTB connected?
Fibre optic cable will run to your building's Main Distribution Frame (MDF), which is typically in the basement or a locked telecommunications cabinet. From there, copper wiring will run to a wall socket in each unit within the building.

What do I need for TPG FTTB?
You can use your own modem with TPG FTTB, or you can go with a TPG supplied modem — whichever suits you. Just keep in mind that if you want to use TPG Voice, you’ll need a TPG supplied modem from the start. You’ll need a high-speed compatible modem with our FTTB Max plan.
Some connections need a Network Termination Unit (NTU), which is an extra device your modem plugs into before plugging into the wall. If you need one, Vision Networks will install it for you during setup — it’s not something we deliver in the box..
Note: If you move out, please leave your NTU behind. It won't be useful at your new place.
If you want to use TPG Voice, you’ll need to plug your phone into your TPG supplied modem.
How does TPG Voice work?
TPG Voice is a VoIP (Voice over Internet Protocol) phone service that uses your internet connection to make phone calls.
How long does it take to get connected to TPG FTTB?
Most connections are done within 10 business days. It may take up to 20 business days if it's the first time your address has been connected to TPG FTTB, or if an installer needs to come to your place.
If you do need an installation, we'll book the earliest available appointment by default - or you can choose a later date if it's more convenient.
Can I use smart wiring with TPG FTTB?
Smart wiring is internal Ethernet cabling at your house. It means you have Ethernet wall sockets to connect devices to your nbn modem without running Ethernet cables along the floor or under doors. It's a good investment for heavy internet uses, or larger homes that don't get enough coverage from a standard Wi-Fi signal.
You can use smart wiring with TPG FTTB, but it won't be included with your installation. You'll need to hire a registered cabler to have smart wiring installed.
Note: Existing smart wiring may need to be re-wired to work with TPG FTTB.
Will my medical alarm, security alarm, EFTPOS machine or fax machine work on TPG FTTB?
Many devices that work over phone lines can work on TPG FTTB, but you need to contact your service provider to make sure before you switch. You may need to get a different type of product that will work on TPG FTTB.
Note: TPG does not offer a Priority Assistance service. If you have Priority Assistance or believe you may be eligible, please consider this before ordering.
If your TPG Fibre to the Building (FTTB) service is having dropouts, it means your internet will go offline and come back online intermittently. These steps will help you identify the issue.
- Your service may just be affected by an outage or planned maintenance. You can check your address on our Network Status page.
If there is an outage or planned maintenance, the results will give you an estimated fix time. - Do you have any devices connected to your modem with an Ethernet cable? If these devices stay connected when devices on Wi-Fi drop out, switch to troubleshooting Wi-Fi Dropouts.
- Find your modem and make sure the cables are plugged in securely and not damaged. Our setup guide will show you how to plug in.
You’ll need to replace any broken or chewed cables. Not all setups have a Network Termination Unit (NTU). - If you have a Network Termination Device (NTU) and you notice any of these status light behaviours, please call us on 1300 997 274.
ZyXel GM4100-B0 G.Fast NTU - Slow blinking green G.Fast light
The phone cable must not be longer than 1 metre.
Adtran® 422G Gfast NTU - Flashing green G.Fast light
The phone cable must not be longer than 1 metre.
LEA Networks NTU - Flashing green OUT or Warning light
Power/DIAG NTU - Red DIAG light
- Still getting dropouts? Please call us on 1300 997 274 and we’ll help you.