You'll need to plug in your modem and change some settings to get it working with TPG nbn Wireless.
-
First, make sure you’ve got a message from us asking you to plug in your nbn modem. We need to get your connection ready on our side before you plug in.
-
Find your nbn Connection Box (NCB) – this is usually installed on the inside of an exterior wall in your home, sometimes in the garage. Unplug any old modem from the nbn Connection Box and power outlet.
-
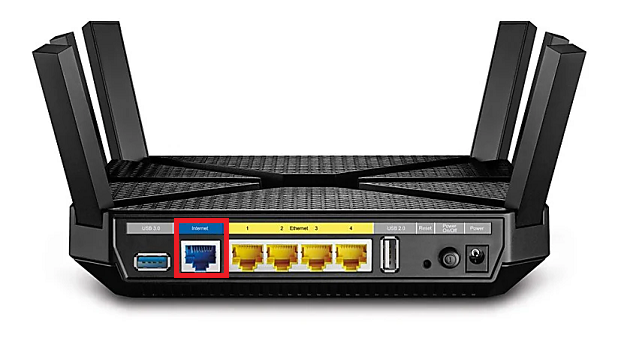
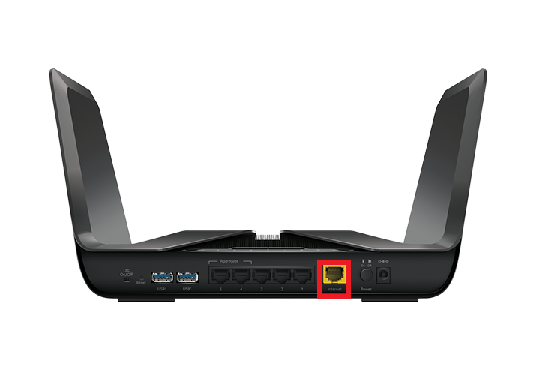
Use the Ethernet cable to connect your modem's blue Internet port to your NCB's UNI-D1 port.
The message from us will tell you if you need to use a different UNI-D port. -
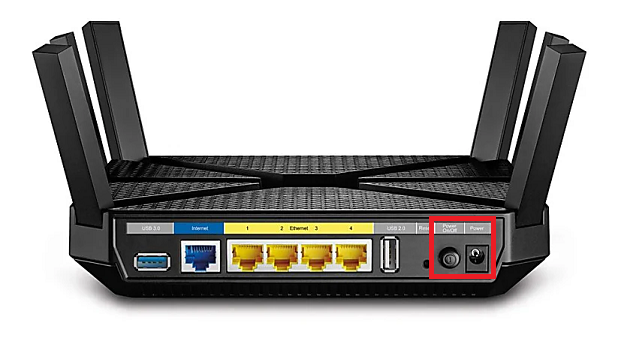
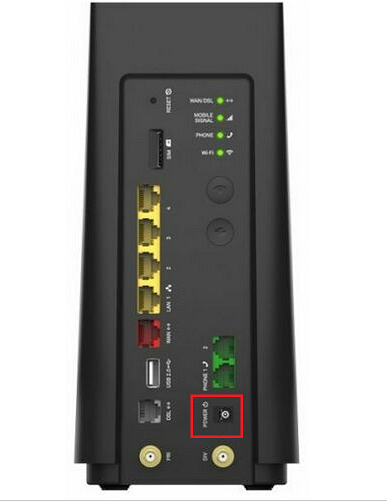
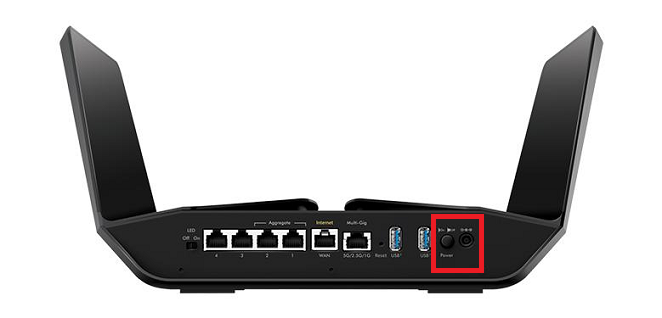
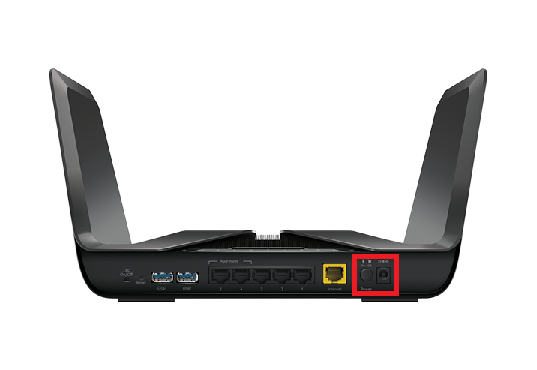
Use the power cable to connect your modem's Power port to a power outlet. Press your modem's Power button to turn it on.
- To connect devices to the WiFi, you'll find the default WiFi name and password on your modem's barcode sticker.
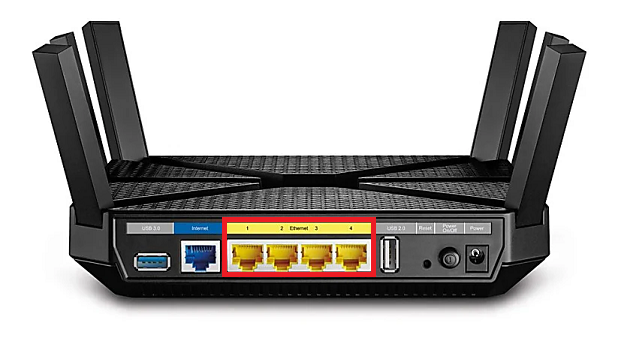
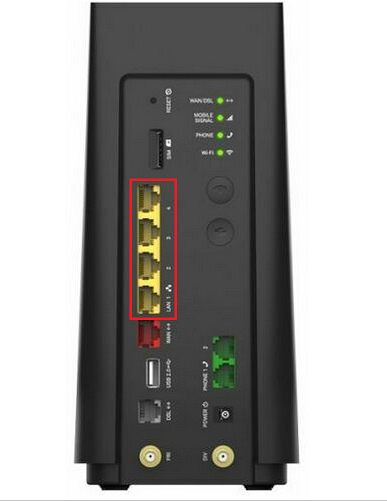
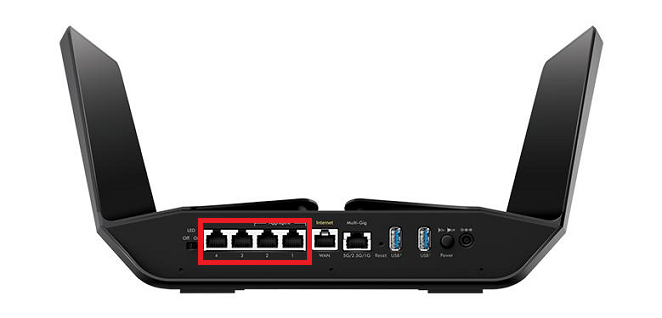
- If you have extra Ethernet cables, you can connect up to 4 devices to your modem’s yellow Ethernet ports.
-
Open your web browser and go to: https://192.168.0.1
-
Log in with the default username "admin" and the default password "admin" on your modem's barcode sticker. If you have custom login details, use those instead.
-
Select Advanced > Network > Internet.
-
Set Internet Connection Type to PPPoE.
-
Enter your TPG username and password.
Your TPG username can be found in emails from us about your TPG order. If you've forgotten your password, reset your password. -
Hit Save.
-
If you have a bundled nbn & phone plan: Select IPTV and tick the Enable box. For ISP Profile, select Custom and enter 2 for Internet VLAN ID. For Internet VLAN Priority, enter 0. Tick the box for 8021Q Tag. For IP-Phone VLAN ID and IPTV VLAN ID, enter any random number between 2 and 4049.
-
Hit Save and you're good to go.
Can't get online? Call us on 1300 997 271 and we'll help you.
You'll need to plug in your modem and change some settings to get it working with TPG nbn Wireless.
-
First, make sure you’ve got a message from us asking you to plug in your nbn modem. We need to get your connection ready on our side before you plug in.
-
Find your nbn Connection Box (NCB) – this is usually installed on the inside of an exterior wall in your home, sometimes in the garage. Unplug any old modem from the nbn Connection Box and power outlet.
-
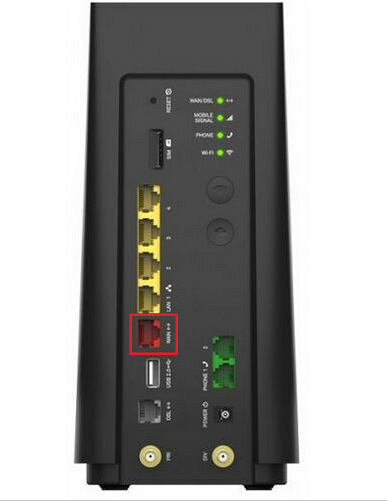
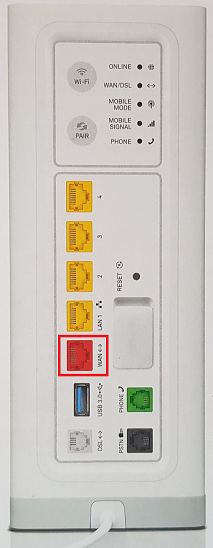
Use the Ethernet cable to connect your modem's red WAN port to your NCB's UNI-D1 port.
The message from us will tell you if you need to use a different UNI-D port. -
Use the power cable to connect your modem's Power port to a power outlet and turn it on.
- To connect devices to the WiFi, you'll find the default WiFi name and password on your modem's barcode sticker.
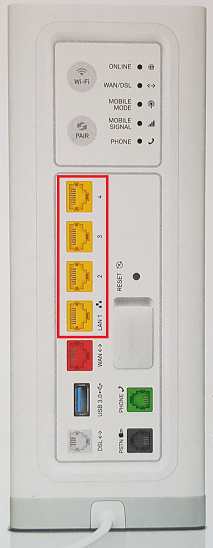
- If you have extra Ethernet cables, you can connect up to 4 devices to your modem’s yellow LAN ports.
-
Open your web browser and go to: https://192.168.0.1 or https://mymodem
-
Log in with the default password found on your modem's barcode sticker. If you have a custom password, use that instead.
-
Hit Internet Access.
-
Under PPP Credential Setting, delete the existing username and password details.
-
Enter your TPG username and password.
Your TPG username can be found in emails from us about your TPG order. If you've forgotten your password, reset your password. -
Hit Save and you're good to go.
Can't get online? Call us on 1300 997 271 and we'll help you.
You'll need to plug in your modem and change some settings to get it working with TPG nbn Wireless.
-
First, make sure you’ve got a message from us asking you to plug in your nbn modem. We need to get your connection ready on our side before you plug in.
-
Find your nbn Connection Box (NCB) – this is usually installed on the inside of an exterior wall in your home, sometimes in the garage. Unplug any old modem from the nbn Connection Box and power outlet.
-
Use the Ethernet cable to connect your modem's red WAN port to your NCB's UNI-D1 port.
The message from us will tell you if you need to use a different UNI-D port. -
Use the power cable to connect your modem's Power port to a power outlet and turn it on.
- To connect devices to the WiFi, you'll find the default WiFi name and password on your modem's barcode sticker.
- If you have extra Ethernet cables, you can connect up to 4 devices to your modem’s yellow LAN ports.
-
Check the lights on your modem. If the Online light is red, you can go to the next step.
No red Online light? Call us on 1300 997 271 and we'll help you. -
Open your web browser and go to: https://192.168.0.1 or https://mymodem
-
Log in with the default password "Telstra" on your modem's barcode sticker. If you have a custom password, use that instead.
-
Hit BROADBAND and delete the existing username and password details.
-
Enter your TPG username and password.
Your TPG username can be found in emails from us about your TPG order. If you've forgotten your password, reset your password. -
Hit Save and you're good to go.
Can't get online? Call us on 1300 997 271 and we'll help you.
This article lists the phone numbers that TPG gives to customers so they can call us.
Using the Find tool in your web browser can help you find a specific phone number on this page:
- On Windows desktop, use CTRL + F on your keyboard to open the Find tool.
- On Mac desktop, use Command + F on your keyboard to open the Find tool.
- On Android mobile, tap More options (the three dots in the top right) then Find in page.
- On iOS mobile, tap Share (the square icon with the upwards arrow at the bottom of the screen) then Find on page.
Phone numbers for you to call us
The following phone numbers are well known from our Contact us page:
- 13 14 23
- 13 42 02
- 1300 043 005
- 1300 242 011
- 1300 365 313
- 1300 403 211
- 1300 659 412
- 1300 720 016
- 1300 769 691
- 1300 799 735
- 1300 865 124
- 1300 920 158
- 1300 993 011
- 1300 993 012
- 1300 993 019
- 1300 994 533
- 1300 995 152
- 1300 997 270
- 1300 997 271
- 1300 997 273
- 1300 997 274
- +61 2 9007 3023
You may receive an email or SMS asking you to call us on a different phone number. These unique numbers help you get through to the right team in our call centre to help you with a specific issue:
- 13 59 91
- 1300 011 146
- 1300 056 356
- 1300 066 305
- 1300 085 262
- 1300 136 740
- 1300 137 425
- 1300 178 122
- 1300 189 663
- 1300 200 733
- 1300 226 799
- 1300 305 522
- 1300 404 856
- 1300 411 801
- 1300 430 925
- 1300 440 184
- 1300 502 337
- 1300 583 153
- 1300 652 209
- 1300 701 202
Please follow the steps below to set up your TG-789 Broadband Gateway.
-
Ensure your nbn® Connection Box is turned on.
-
Plug an Ethernet cable from the UNI-D 1 port on your NBN Connection Box into the red WAN port on your TG-789.
Note: If UNI-D 1 doesn't work, try each UNI-D port. -
Plug in the power cable and turn your TG-789 on using the Power button.
-
Connect a device to your TG-789 via WiFi or Ethernet cable.
-
Go to 10.1.1.1 in your browser.
-
Log in with your TG-789 username and password. By default, these are printed on the barcode sticker at the bottom of your TG-789.
-
On the home screen, click Setup Wizard in the top right-hand corner.
-
Select TPG as the Internet Service Provider.
-
Select Ethernet as the WAN Interface.
-
Select PPP over Ethernet as WAN Type.
-
Depending on your nbn plan, additional settings may be needed.
For Data Only nbn plans, skip to step 12.
For Bundled nbn plans (Internet & Phone), change VLAN Enabled to On and set VLAN ID to 2. -
Enter your TPG Username and password
-
Select Next and continue with the Wizard in setting up your WiFi.
-
Select Finish at the end of the Wizard.
Your TG-789 should now be online. If you're still having issues, please see Improving WiFi Signal or call us on 1300 997 271 for further assistance.
You'll need to plug in your modem and change some settings to get it working with TPG nbn Wireless.
-
Make sure your Orbi is running the latest firmware from Netgear.
-
First, make sure you’ve got a message from us asking you to plug in your nbn modem. We need to get your connection ready on our side before you plug in.
-
Find your nbn Connection Box (NCB) – this will be connected to the wall socket for your nbn Wireless antenna. You probably already have a modem plugged in from your last internet service. Unplug any old modem from the NCB and power outlet.
-
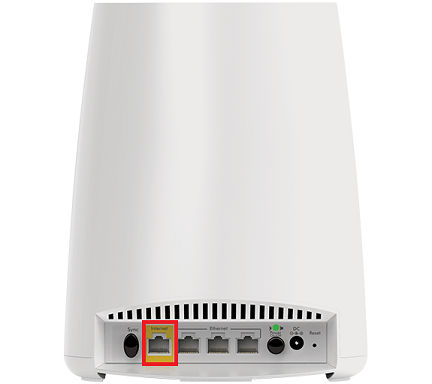
Use the Ethernet cable to connect your modem's yellow Internet port to your NCB's UNI-D1 port.
-
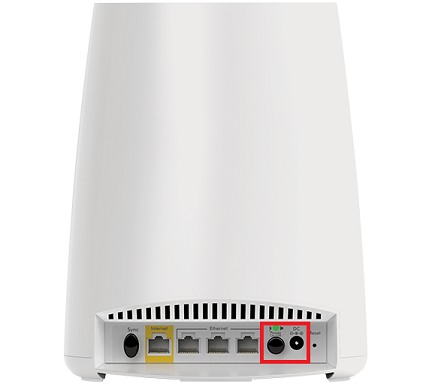
Use the power cable to connect your modem's Power port to a power outlet. Press your modem's Power button to turn it on.
- To connect devices to the WiFi, you'll find the default WiFi name and password on your modem's barcode sticker.
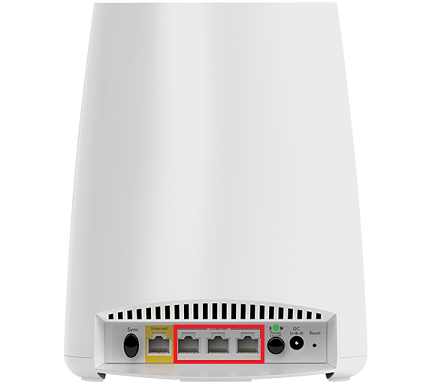
- If you have extra Ethernet cables, you can connect up to 4 devices to your modem’s yellow LAN ports.
-
Open your web browser and go to: https://192.168.0.1 https://www.routerlogin.net
-
Log in with the default username "admin" and the default password "password" on your modem's barcode sticker. If you have custom login details, use those instead.
- Hit Advanced.
-
Select Setup > Internet Setup.
-
For Does your Internet connection require a login?, hit Yes.
-
Set Internet Service Provider to PPPoE.
-
Enter your TPG username and password.
Your TPG username can be found in emails from us about your TPG order. If you've forgotten your password, reset your password. -
Hit Apply.
-
If you have a bundled nbn & phone plan: Select Advanced Setup > VLAN/Bridge Settings and turn on VLAN/Bridge group. Select By VLAN tag group and set VLAN ID to 2. Set Priority to 0.
- Hit Apply and you're good to go.
Can't get online? Call us on 1300 997 271 and we'll help you.
You'll need to plug in your modem and change some settings to get it working with TPG nbn Wireless.
-
First, make sure you’ve got a message from us asking you to plug in your nbn modem. We need to get your connection ready on our side before you plug in.
-
Find your nbn Connection Box (NCB) – this will be connected to the wall socket for your nbn Wireless antenna. You probably already have a modem plugged in from your last internet service. Unplug any old modem from the NCB and power outlet.
-
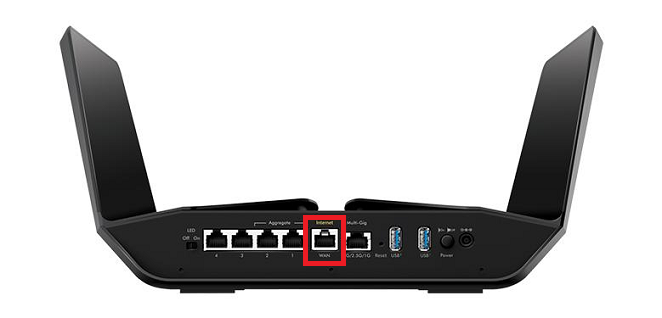
Use the Ethernet cable to connect your modem's Internet/WAN port to your NCB's UNI-D1 port.
-
Use the power cable to connect your modem's Power port to a power outlet. Press your modem's Power button to turn it on.
- To connect devices to the WiFi, you'll find the default WiFi name and password on your modem's barcode sticker.
- If you have extra Ethernet cables, you can connect up to 4 devices to your modem’s yellow LAN ports.
-
Open your web browser and go to: https://192.168.1.1 or https://www.routerlogin.net
-
Log in with the default username "admin" and the default password "password" on your modem's barcode sticker. If you have custom login details, use those instead.
-
Set WAN Preference to Internet Port.
-
Set Encapsulation to PPPoE (PPP over Ethernet).
-
Enter your TPG username and password.
Your TPG username can be found in emails from us about your TPG order. If you've forgotten your password, reset your password. -
Hit Apply.
-
If you have a bundled nbn & phone plan: Select Advanced > Advanced Setup > VLAN/Bridge Settings, and tick the box for VLAN/Bridge group. Select By VLAN tag group, hit Add and enter a Name, e.g. "TPG". Set VLAN ID to 2 and Priority to 0, then hit Add.
-
Hit Apply and you're good to go.
Can't get online? Call us on 1300 997 271 and we'll help you.
You'll need to plug in your modem and change some settings to get it working with TPG nbn Wireless.
-
First, make sure you’ve got a message from us asking you to plug in your nbn modem. We need to get your connection ready on our side before you plug in.
-
Find your nbn Connection Box (NCB) – this will be connected to the wall socket for your nbn Wireless antenna. You probably already have a modem plugged in from your last internet service. Unplug any old modem from the NCB and power outlet.
-
Use the Ethernet cable to connect your modem's yellow Internet port to your NCB's UNI-D1 port.
-
Use the power cable to connect your modem's Power port to a power outlet. Press your modem's Power button to turn it on.
- To connect devices to the WiFi, you'll find the default WiFi name and password on your modem's barcode sticker.
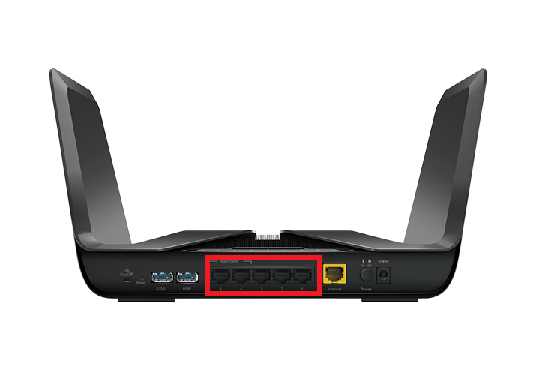
- If you have extra Ethernet cables, you can connect up to 5 devices to your modem’s LAN ports.
-
Open your web browser and go to: https://192.168.1.1 or https://www.routerlogin.net
-
Log in with the default username "admin" and the default password "password" on your modem's barcode sticker. If you have custom login details, use those instead.
-
Hit Internet.
-
For Does your Internet connection require a login?, hit Yes.
-
Set Encapsulation to PPPoE (PPP over Ethernet).
-
Enter your TPG username and password.
Your TPG username can be found in emails from us about your TPG order. If you've forgotten your password, reset your password. -
Hit Apply.
-
If you have a bundled nbn & phone plan: Select Advanced > Advanced Setup > VLAN/Bridge Settings, and tick the box for VLAN/Bridge Setup. Select By VLAN tag group, hit Add and enter a Name, e.g. "TPG". Set VLAN ID to 2 and Priority to 0, then hit Add.
-
Hit Apply and you're good to go.
Can't get online? Call us on 1300 997 271 and we'll help you.
Here's a rundown of the different types of Account Contacts that can be on your TPG account.
As the account holder, you can add an Account Contact to be authorised to access or change your account.
Select one of the links below to jump to a query:
Billing Contact
Each Billing contact is an “account holder”.
Billing contacts can:
- Add new contacts to an account
- Edit existing account contacts
- Add, change, or relocate any non-telephony services on the account
- Cancel services* or close an account
- Lodge service faults**
- Access invoices and other billing/payment information
- Change payment details
- Request to link accounts that have the same account holder (full name and date of birth must match
Billing contacts can't:
- *Add, change, cancel or relocate any phone services unless they're also listed as a Phone contact.
- **Lodge phone faults unless they're also listed as a Phone contact.
Phone Contact
The Phone contact (aka Legal Lessee) has authority over all phone services on the account.
A Phone contact can:
- Add a new phone service to the account
- Make changes to phone services*
- Cancel or relocate phone services
- Lodge phone faults
A Phone contact can't:
- Add, change, cancel or relocate any non-phone services on the account like nbn unless they're also listed as a Billing contact.
- Lodge non-phone faults unless they're also listed as a Billing contact.
- *Change a phone service in a way that will increase the plan fee or incur a one-off charge, unless they're also listed as a Billing contact.
If the Phone contact and Billing contact are two different people, we'll need authorisation from both people. If the other contact isn't with you when you call us, we can conference call them using the contact number listed on the account.
Technical Contact
Technical contacts can make technical changes to the account without having access to billing information.
Technical contacts can:
- Troubleshoot a service with our Support Team
- Lodge a service fault
Technical contacts can't:
- Access billing information or service passwords
- Change account details
- Add, change, cancel or relocate any services
User Contact
User contacts are the same as Technical contacts, except they can't lodge any service faults.
More information
How do I add, edit or delete an existing contact on my account?
Check out Updating your contact details in My Account.
Can't a add new contact in My Account or need to change a Phone contact? Call us on 13 14 23 and we'll help you.
How do I take over an account when the contacts are unreachable?
If you need to take over an account via Power of Attorney or any scenario where the account holder can't be reached, please call us on 13 14 23.
You'll need to plug in your Netgear Nighthawk RAX50 and change some settings to get it working with TPG nbn Wireless.
-
First, make sure you’ve got a message from us asking you to plug in your nbn modem. We need to get your connection ready on our side before you plug in.
-
Find your nbn Connection Box (NCB) – this is usually installed on the inside of an exterior wall in your home, sometimes in the garage. Unplug any old modem from the nbn Connection Box and power outlet.
-
Attach the antennas to your modem and put them in an upright position.
Each antenna has a label that must match the label on the antenna socket. -
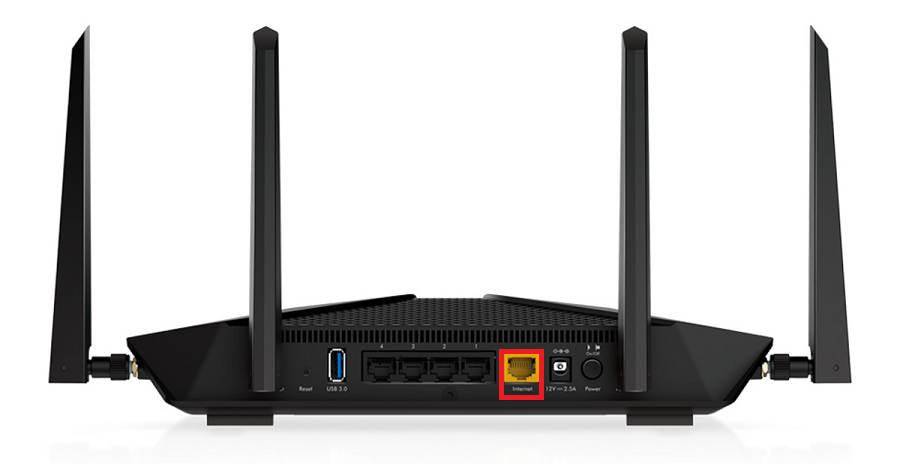
Use the Ethernet cable to connect your modem's yellow Internet port to your NCB's UNI-D1 port.
The message from us will tell you if you need to use a different UNI-D port. -
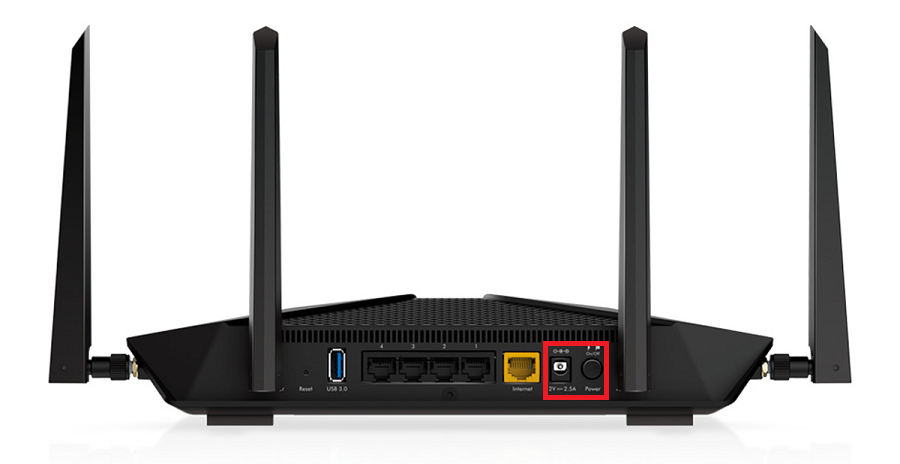
Use the power cable to connect your modem's Power port to a power outlet. Press your modem's Power button to turn it on.
- To connect devices to the WiFi, you'll find the default WiFi name and password on your modem's barcode sticker.
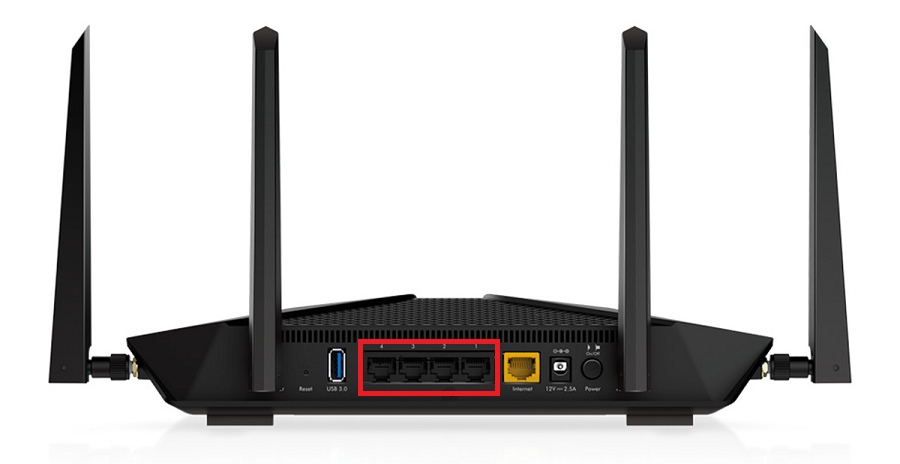
- If you have extra Ethernet cables, you can connect up to 4 devices to your modem’s yellow LAN ports.
-
Open your web browser and go to: https://192.168.1.1 or https://www.routerlogin.com
-
Log in with the default username "admin" and the default password "password" on your modem's barcode sticker. If you have custom login details, use those instead.
-
Select BASIC > Internet.
-
For Does your Internet connection require a login?, hit Yes.
-
Set Internet Service Provider to PPPoE.
-
Enter your TPG username and password.
Your TPG username can be found in emails from us about your TPG order. If you've forgotten your password, reset your password. -
Set Connection Mode to Always On.
-
Set Idle Timeout (In minutes) to 0. This will stop your internet connection logging out after a period of inactivity.
-
Set Internet IP Address to Get Dynamically from ISP.
-
Set Domain Name Server (DNS) Address to Get Automatically from ISP.
Prefer to select Use These DNS Servers? TPG's primary DNS is 203.12.160.35 and the secondary DNS is 203.12.160.36. -
Set Router MAC Address to Use Default Address.
-
Hit Apply.
-
If you have a bundled nbn & phone plan: Select ADVANCED > Advanced Setup > VLAN/Bridge Settings and tick the box for Enable VLAN/Bridge Setup. Select By VLAN tag group and then hit Add. Enter a Name, e.g. "TPG", set VLAN ID to 2 and set Priority to 0.
-
Hit Apply and you're good to go.
Can't get online? Call us on 1300 997 271 and we'll help you.
