Once Speed Dial 8 has been configured, BizPhone customers can pick up their phone and press a single number of the speed dial (2-9) and then press “Send” to connect a call.
Select one of the links below to jump to a query:
Configure Speed Dial 8 in Frontier Portal
-
Log in to Frontier Portal. If you have never logged in before, please watch this video.
-
Select the desired BizPhone user to edit.
Note: Speed Dial 8 must be set up individually for each BizPhone user.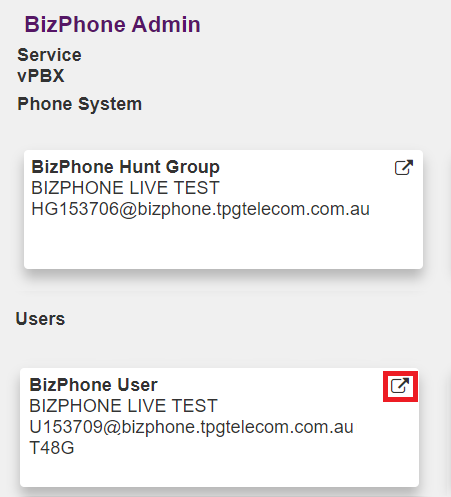
-
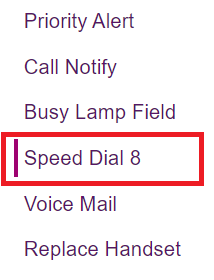
Select Speed Dial 8.
-
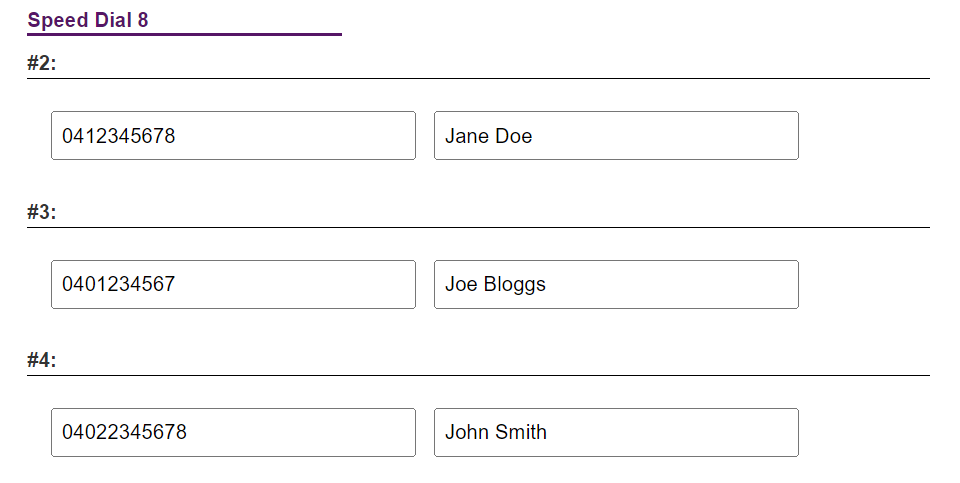
Each available entry corresponds to the speed dial keys (2-9). Enter the desired phone number in the Phone Number field, and a relevant Description.
-
Select Update to save your changes.

Configure Speed Dial 8 on your BizPhone handset
-
Lift your BizPhone handset and dial *74.
-
When you hear the dial tone, enter the one-digit code (2-9) that you want to represent the number you want to program, followed by the complete phone number and press the “#” key.
For example, to configure speed dial 3 to dial 13 86 89, dial: *74, 3, 138689 -
Hang up to finish.
It's important to tell us when you're moving so we can move your TPG services with you. Some internet services take time to connect, especially if equipment needs to be installed at your new address, so let us know as soon as possible.
A different type of internet may be available at your new address.
Do you only have TPG Mobile? You don't need to relocate a mobile service, but it's good idea to check your new address on our coverage map.
-
You can relocate your 5G Home Broadband or Home Wireless Broadband service in My Account.
Have a different type of TPG internet? Call us on 1300 865 124 and we'll help you out. -
Log in and hit Moving Home.
Never used My Account before? Check out An Introduction to My Account. -
Tick the "I confirm that permission is granted" box to confirm that you're the account holder or have the account holder's permission for the move.

-
Enter your New Service Address.
If you don't choose from the list of auto-completed addresses, you'll be asked to confirm your address details.
-
If the same type of internet is available at your new address, you can choose the date you'd like to move from the Schedule a Date drop-down, then hit Get Started.
If a different type of internet is needed at your new address, you'll be redirected to our website. Give us a call on 1300 865 124 if you need help picking a new plan.
-
You'll see a summary of your order. Tick the box to agree to the terms and hit Confirm to submit your order.
We'll keep you updated about your order over email and SMS.
Most Wi-Fi 6 modems can support Wi-Fi speeds of up to 1000Mbps (1Gbps), and at least that speed via Ethernet. Some modems even offer Ethernet ports capable of 2.5Gbps or higher. However, your actual speeds can vary depending on several factors, including your internet plan, your modem's capability, and overall internet traffic. Your internet plan’s Typical Evening Speed will give you a realistic estimate of the speeds you'll experience.
Your choice of modem and how you set it up in your home could stop you from getting the maximum speed of your internet plan. If you choose to bring your own (BYO) modem instead of using a TPG-supplied modem, it must meet certain technical requirements for optimal performance on our NBN500, nbn Superfast & nbn Ultrafast plans.
Select one of the links below to jump to a query:
- High speed nbnⓇ modem requirements
- Compatible modems on our high speed nbnⓇ plans
- Modems that may not work on our high speed nbnⓇ plans
High speed nbnⓇ modem requirements
Your modem must support or feature:
- PPPoE connection types
- Gigabit Ethernet ports
- Wi-Fi 6 (802.11ax) or later
We also recommend:
- Using a modem that features Band Steering so devices will automatically switch between 2.4GHz and 5GHz Wi-Fi for the best performance and connection stability.
- Connecting your devices via Ethernet Cable (CAT5e or higher) instead of Wi-Fi.
- Getting a Mesh network for better Wi-Fi signal in a large property.
Important: If you choose to use an older modem that doesn't have Gigabit Ethernet ports or Wi-Fi 6, your connection may be slower. We recommend connecting devices by Ethernet cable instead of Wi-Fi to get the best possible experience.
Compatible modems on our high speed nbnⓇ plans
All modems listed here can achieve the maximum speed of our NBN500, nbn Superfast and nbn Ultrafast plans, which are delivered over nbn FTTP and nbn HFC.
If your modem isn't listed here, please contact the manufacturer for more info.
Legend
| Icon | Advice |
|---|---|
| ✅ Supported | Maximum speeds are supported via Ethernet & Wi-Fi. |
| ⚠️ Ethernet only | Maximum speeds are supported via Ethernet. Maximum speeds are not supported via Wi-Fi. |
| Modem | NBN500 | nbn Superfast | nbn Ultrafast |
|---|---|---|---|
| Amazon Eero 6* | ✅ Supported | ✅ Supported | ✅ Supported |
| Amazon Eero 6+* | ✅ Supported | ✅ Supported | ✅ Supported |
| Amazon Eero Pro 6* | ✅ Supported | ✅ Supported | ✅ Supported |
| Amazon Eero Pro 6E* | ✅ Supported | ✅ Supported | ✅ Supported |
| Amazon Eero 7* | ✅ Supported | ✅ Supported | ✅ Supported |
| Amazon Eero Pro 7* | ✅ Supported | ✅ Supported | ✅ Supported |
| Amazon Eero Max 7* | ✅ Supported | ✅ Supported | ✅ Supported |
| Asus RT-AX86U (AX5700) | ✅ Supported | ✅ Supported | ✅ Supported |
| Asus RT-AX88U (AX5400) | ✅ Supported | ✅ Supported | ✅ Supported |
| D-Link AX1800 (DSL-X1852E) | ✅ Supported | ✅ Supported | ⚠️ Ethernet only |
| D-Link AX3000 (DSL-X3052E) | ✅ Supported | ✅ Supported | ✅ Supported |
| D-Link VIPER 2600 (DSL-3900) | ✅ Supported | ✅ Supported | ⚠️ Ethernet only |
| D-Link EXO AX AX5400 (DIR-X5460) | ✅ Supported | ✅ Supported | ✅ Supported |
| Fritz!Box 7490 | ⚠️ Ethernet only | ⚠️ Ethernet only | ⚠️ Ethernet only |
| Fritz!Box 7530 | ✅ Supported | ✅ Supported | ✅ Supported |
| Fritz!Box 7590 | ✅ Supported | ✅ Supported | ✅ Supported |
| NetComm NF20MESH | ✅ Supported | ✅ Supported | ✅ Supported |
| Netgear Nighthawk RAX120 | ✅ Supported | ✅ Supported | ✅ Supported |
| Netgear Nighthawk RAX50 | ✅ Supported | ✅ Supported | ✅ Supported |
| Netgear Nighthawk RS700S | ✅ Supported | ✅ Supported | ✅ Supported |
| Technicolor TG-789 Broadband Gateway | ⚠️ Ethernet only | ⚠️ Ethernet only | ⚠️ Ethernet only |
| Telstra Smart Modem 3 | ✅ Supported | ✅ Supported | ✅ Supported |
| TP-Link Archer AX20 (AX1800) | ✅ Supported | ✅ Supported | ✅ Supported |
| TP-Link Archer AX73 (AX5400) | ✅ Supported | ✅ Supported | ✅ Supported |
| TP-Link Archer BE800 (BE19000) | ✅ Supported | ✅ Supported | ✅ Supported |
| TP-Link Archer VR1600v | ⚠️ Ethernet only | ⚠️ Ethernet only | ⚠️ Ethernet only |
| TP-Link Archer VR2100v | ✅ Supported | ✅ Supported | ✅ Supported |
| TP-Link Deco M9 | ✅ Supported | ✅ Supported | ⚠️ Ethernet only |
| TP-Link Deco X60 | ✅ Supported | ✅ Supported | ✅ Supported |
| TP-Link VX220-G2V | ✅ Supported | ✅ Supported | ✅ Supported |
| TP-Link VX230v | ✅ Supported | ✅ Supported | ✅ Supported |
| TP-Link VX420-G2H | ✅ Supported | ✅ Supported | ✅ Supported |
| TP-Link VX420-G2V | ✅ Supported | ✅ Supported | ✅ Supported |
| Vodafone Super Wi-Fi | ✅ Supported | ✅ Supported | ✅ Supported |
| Vodafone WiFi Hub 2.0 (Netcomm NL1902) | ✅ Supported | ✅ Supported | ✅ Supported |
| Vodafone WiFi Hub 3.0 (Netcomm NL20) | ✅ Supported | ✅ Supported | ✅ Supported |
| Wi-Fi Max | ✅ Supported | ✅ Supported | ✅ Supported |
*Amazon Eero modems support PPPoE & VLAN tagging on devices running eeroOS 6.6.1+ and mobile app versions 6.13.0+.
Modems that may not work on our high speed nbnⓇ plans
- The Google Nest Wi-Fi does not support VLAN tagging by default
- The Sagemcom Fast 5657 (Optus Ultra WiFi Modem) may not allow user-configurable VLAN Tagging.
You can transfer ownership of your TPG account to another person if they agree to become the account holder and be responsbile for paying for the TPG account, including any outstanding charges from the before the date they took ownership.
You and the new account owner are are responsible for settling any amounts you owe each other between yourselves. We won't mediate in any way; we will only send invoices to the new account holder. If you're not comfortable with this, then we recommend that you do not transfer ownership and the other person can order a new service.
- Download, complete and return the following forms.
- Change of Ownership form.
- Direct Debit Authorisation form.
- Customer Service Guarantee (CSG) Waiver.
Note: If you have TPG Mobile, please write your TPG mobile number in the space below the "Change of Ownership Form" title.
- Attach one form of valid ID for the current account holder and the new account holder, such as a photo of an Australian driver's license or passport.
-
Email the completed form and attachments to adsl_admin@tpg.com.au (for internet services) or mobilesupport@tpg.com.au (for mobile services).
-
We'll let you and the new account holder know when the change of ownership is complete. Once it is, you will no longer have access to your old TPG account, including any call records or previous invoice.
If you need previous TPG invoices for tax purposes, please let us know so we can provide them before the change of ownership is complete.
Please note: If you have customised your BizPhone handset in any way, such as adding contacts to the directory or changing ringtone settings, these will be removed after a factory reset. However, the Global Address Book will not be affected.
Select your handset:
BizPhone Cordless (W60P or W56P)
-
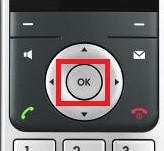
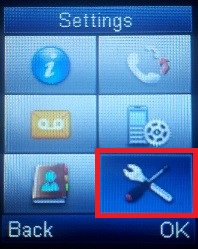
Press the OK button on your handset to go to the main menu.
-
Select Settings.
-
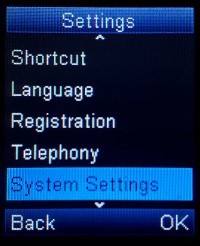
Scroll down the list and select System Settings.
-
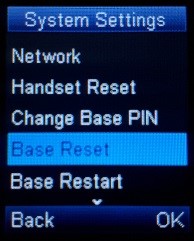
Select Base Reset.
-
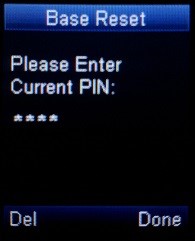
Enter the PIN "0000".
-
The base station for the handset will factory reset and download the required configuration from the server.
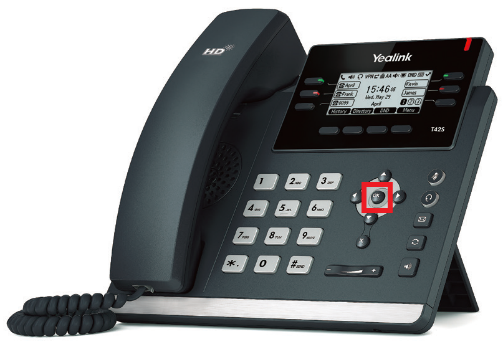
BizPhone Standard (T42G or T42S)
-
Press and hold the OK button on your handset for 10 seconds.
-
Confirm the reset by pressing OK again.
-
The reset will take approximately 2-5 minutes to complete.
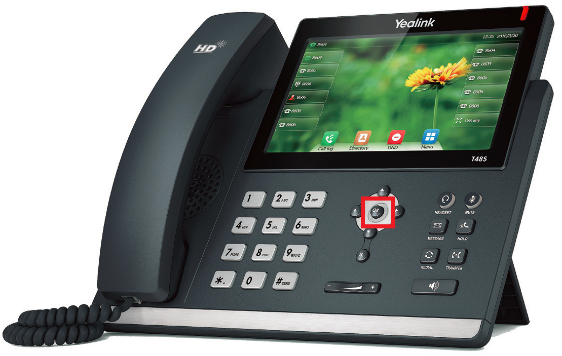
BizPhone Premium (T48G or T48S)
-
Press and hold the OK button on your handset for 10 seconds.
-
Confirm the reset by pressing OK again.
-
The reset will take approximately 2-5 minutes to complete.
If you want to use any calls, text or data that isn't included in your TPG mobile plan, you'll need to top up your Prepaid Balance in My Account.
-
Log in to My Account and hit Top up Prepaid Balance.
Never used My Account before? Check out An Introduction to My Account. -
Choose the amount to top up ($10, $20, $50, $100 or $200) and hit Review order.

-
You'll see a summary of your purchase. Use the checkbox to agree to the terms and conditions, then hit Proceed. Your Prepaid Balance will be applied after your payment clears.
Note: Direct Debit payments may take up to 3 business days to clear. Credit card payments are recommended for the fastest top up.
You can customise your Wi-Fi name and password in your TPG modem settings.
Don't have a TPG modem? Check the manufacturer's website for a guide.
Choose your modem:
| Picture | Modem |
|---|---|
 |
NetComm NL20 Modem |
 |
Wi-Fi Max 5G Modem |
 |
VX220-G2V Modem |
 |
VX420-G2V Modem |
 |
VX420-G2H Modem |
 |
Nokia FastMile 3.2 5G Modem |
 |
Sagemcom 5866 5G Modem |
 |
TP-Link VR1600v Modem |
Change your Wi-Fi password on a NetComm NL20 Modem
- Open your web browser and go to: http://192.168.1.1.
- Log in with the Username and Password found on the modem's barcode sticker or use your custom password.

- In the left pane, click Wireless.
- Select the 2.4GHz or 5GHz radio button, depending on which Wi-Fi password you'd like to change.
Important: Make sure the names and passwords match for both 2.4GHz and 5GHz – this lets devices automatically switch between networks for the best Wi-Fi signal. We recommend you use the 5GHz Wi-Fi instead of the slower 2.4GHz Wi-Fi unless your devices are too old to connect with the 5GHz Wi-Fi. - If you want to change your Wi-Fi name, type it in the Name box.
- Type your new Wi-Fi password in the Password box.
- Hit Save to finish.

Change your Wi-Fi password on a Wi-Fi Max 5G Modem
From the My Internet Connect App
Don't want to use the app? You can change the Wi-Fi password in your web browser.
- Open the My Internet Connect App and tap Settings.
- Under Network Management, select Wi-Fi Settings.
- Enter your desired new password in the Wi-Fi Password field.
- Enter your Wi-Fi name and Password as desired then click the blue tick at the top right of the screen.
Note: If Band Steering is toggled OFF, you will need to update the password for both 2.4GHz and 5GHz Wi-Fi. We recommend you use the 5GHz Wi-Fi unless your devices are too old to connect to the 5GHz network. - The app will start to update the network details. This will take 2-3 minutes to complete.
- Select Save, then reconnect your Wi-Fi devices using your new password.

Using your web browser
- Open your web browser and go to: https://192.168.1.1
- Log in with the Login Password found on the modem's barcode sticker, or use your custom password.

- From the left pane, click Wi-Fi.
- Under Basic, enter your desired new password in the Wi-Fi Password field.
Note: If Band Steering is toggled OFF, you will need to update the password for both 2.4GHz and 5GHz Wi-Fi. We recommend you use the 5GHz Wi-Fi unless your devices are too old to connect to the 5GHz network. - Enter your Wi-Fi name and Password as desired.
- Hit Save Settings, then reconnect your Wi-Fi devices using your new password.

Change your Wi-Fi password on a VX220-G2V Modem
- Open your web browser and go to: https://192.168.1.1
- Log in with the default password found on your modem's barcode sticker. If you have a custom password, use that instead.

- Select Wireless.
- Type your new password in the Password box.
Note: If Band Steering is turned off, you can set different passwords for the 2.4GHz and 5GHz Wi-Fi networks. - Hit Save, then reconnect your Wi-Fi devices using your new password.

Change your Wi-Fi password on a VX420-G2V Modem
- Open your web browser and go to: https://192.168.1.1
- Log in with the default password “admin”. If you have a custom password, use that instead.
- Select Wireless.
- Type your new password in the Password box.
Note: If Band Steering is turned off, you can set different passwords for the 2.4GHz and 5GHz Wi-Fi networks. - Hit Save, then reconnect your Wi-Fi devices using your new password.

Change your Wi-Fi password on a Smart Modem Gateway (VX420-G2H)
- Open your web browser and go to: https://192.168.1.1
- Log in with the default password “admin”. If you have a custom password, use that instead.
- Select Wireless.
- Type your new password in the Password box.
Note: If Band Steering is turned off, you can set different passwords for the 2.4GHz and 5GHz Wi-Fi networks. - Hit Save, then reconnect your Wi-Fi devices using your new password.

Change your Wi-Fi password on a Nokia FastMile 3.2 5G Modem
Using the Nokia Wi-Fi App
Don't want to use the app? You can change the Wi-Fi password in your web browser.
- Open the Nokia Wi-Fi app and tap Settings.
- Under Wi-Fi Networks, tap your Wi-Fi name.
You'll find your modem's default Wi-Fi name (SSID) on its barcode sticker, e.g. "NOKIA-XXXX".
- Tap the Pencil icon in the top right-hand corner.

- Enter your new Wi-Fi Name and Password, then tap the Tick icon in the top right-hand corner.

- A pop-up will remind you that you need to reconnect your devices to the Wi-Fi using the new name/password. Tap Ok, got it to finish.
- Wait 2-3 minutes, then reconnect your Wi-Fi devices using your new password.
Using your web browser
- Open your web browser and go to: https://192.168.1.1
- Log in with your default username "admin" and the default password is on your modem's barcode sticker. If you have custom login details, use those instead.

- Hit Network.
- Select Wi-Fi Networks, then 2.4GHz.
- If you want to change your Wi-Fi name, type it in the SSID Name box.
- Type your new Wi-Fi password in the Wi-Fi Key box, then hit Save Changes.
- Select 5GHz and enter your new SSID Name and/or Wi-Fi Key, then hit Save Changes.
Important: If Enable Single SSID is ON, make sure the names and passwords match for both 2.4GHz and 5GHz – this lets devices automatically switch between networks for the best Wi-Fi signal. - Reconnect your Wi-Fi devices using your new password.

Change your Wi-Fi password on a Sagemcom 5866
- Open your web browser and go to: https://192.168.1.1
- Log in with the default username “admin” and the default password on your modem's barcode sticker. If you have custom login details, use those instead.

- Select the cog icon on the Wi-Fi 2.4GHz or 5GHz panel.

- If you want to change your Wi-Fi name, type it in both SSID boxes.
- Type your new Wi-Fi password in both Password boxes.
Important: Make sure the SSIDs and passwords match for both 2.4GHz and 5GHz – this lets devices automatically switch between networks for the best Wi-Fi signal. - Hit Apply, then reconnect your Wi-Fi devices using your new password.

Change your Wi-Fi password on a TP-Link VR1600v
- Open your web browser and go to: https://192.168.1.1
- Log in with the default username "admin" and default password “admin”. If you have custom login details, use those instead.
- Select Wireless.
- Type your new password in the Password boxes for "2.4GHz Wiress Network" and "5GHz Wireless Network".
We recommend using the 5GHz Wi-Fi instead of the slower 2.4GHz Wi-Fi unless your devices are too old to connect to 5GHz Wi-Fi. - Hit Save, then reconnect your Wi-Fi devices using your new password.

You can check the data usage for your TPG Mobile service at any time. We'll also let you know when you've hit 50%, 85% and 100% of your monthly mobile data - the same goes for any other monthly plan inclusions, like international minutes.
Usage records in My Account may be delayed by up to 48 hours.
-
Log in to My Account and hit Mobile Usage.
Never used My Account before? Check out An Introduction to My Account.
-
You'll see the usage for your current billing period by default. To see older usage, choose from the Date range drop-down menu.

-
You can switch between the Data and Talk & Text tabs depending on which type of mobile usage you want to check.
-
When viewing Data, you can filter by All data usage, data usage In Australia, or International Roaming.

-
The Talk & Text tab will show all your calls and texts for that billing period, including Date/Time, Called Number, Duration, Call Type, Area Called and Cost.

For more information about setting up your BizPhone Queue, see our video tutorials.
If you have requested a Queue to be added to your BizPhone service, you are able to set up two different audio types:
- An Entrance Announcement which plays when a call enters the queue; and
- An On-Hold Announcement which plays when a call in the queue is placed on hold.
Audio you upload in this section can also be accessed and used for other BizPhone features.
-
Log in to Frontier Portal. If you have never logged in before, please watch this video.
-
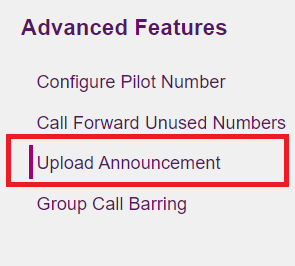
Select the arrow next to Advanced Features to expand the options.

-
Select Upload Announcement.
-
Use the Choose File button to select your audio file, then select Update to save. Repeat these steps if you wish to upload multiple audio files.
Note: See below for detailed information about audio file requirements.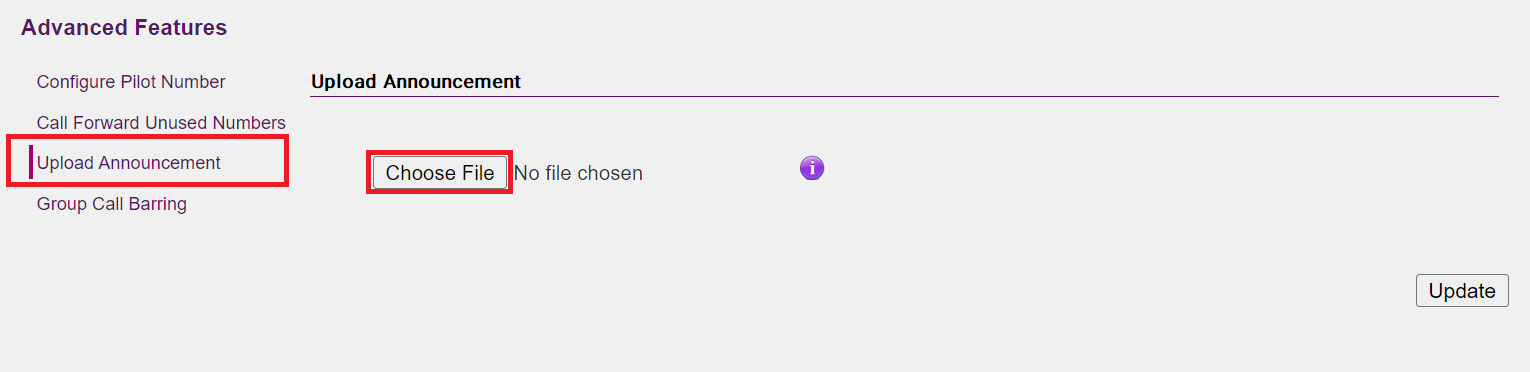
-
Next, return to the BizPhone Admin page in Frontier and select your BizPhone Queue.
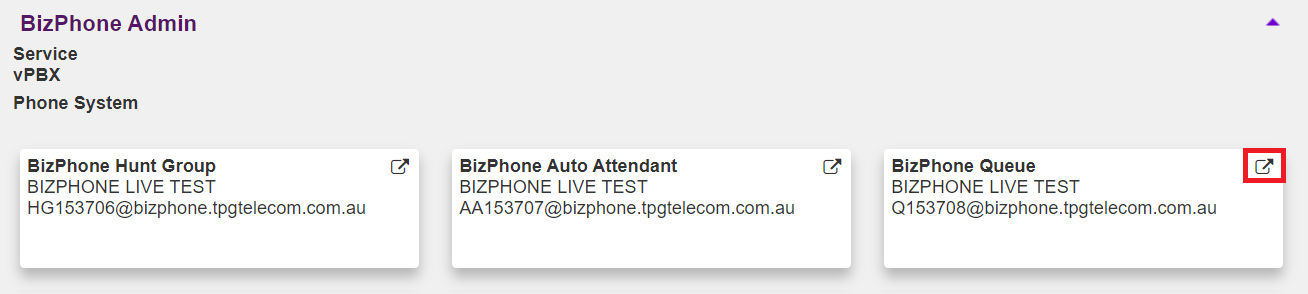
-
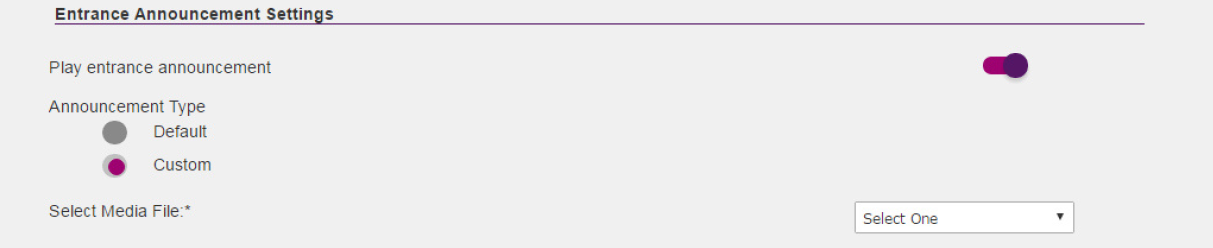
If you wish to set up an Entrance Announcement, set the Play entrance announcement switch to ON.
-
Select Custom and select your desired entrance announcement audio from the list of previously uploaded audio.
-
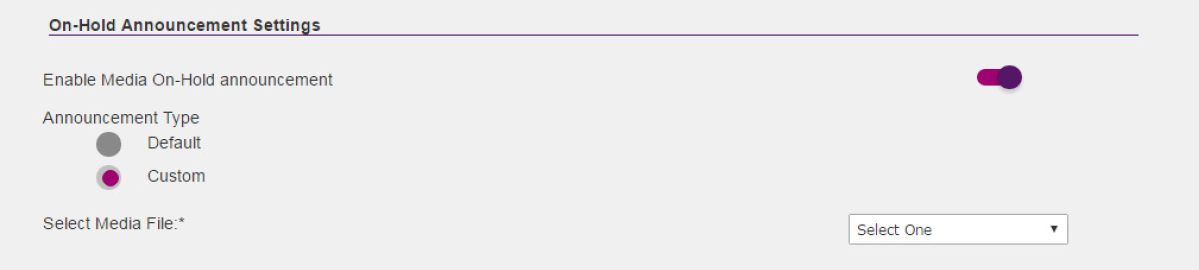
If you wish to set up an On-Hold Announcement, set the Enabled Media On-Hold announcement switch to ON.
-
Select Custom and select your desired on-hold announcement audio from the list of previously uploaded audio.
-
Select Update to finish.
Your audio file must meet the following specifications:
| Audio file format | Specifications |
|---|---|
| .WAV |
|
| .WMA |
|
| Both .WAV and .WMA |
|
If required, click here to search for online audio conversion sites to find one that best suits you.
You can upload your own custom audio to replace the default piano music which is played when you place a call on hold. Audio you upload in this section can also be accessed and used for other BizPhone features.
-
Log in to Frontier Portal. If you have never logged in before, please watch this video.
-
Select the arrow next to vPBX Music on Hold to expand the options.

-
Set the Enable music/video during Call Hold switch to ON.

-
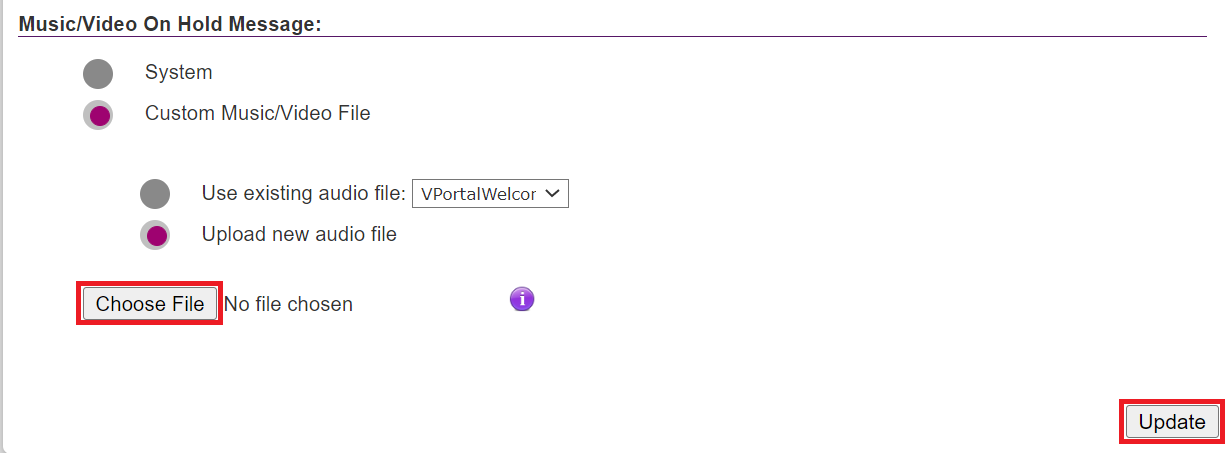
Select Custom Music/Video File.
-
Choose from an existing audio file, or select Upload new audio file and use the Choose File button to select your audio file.
Note: See below for detailed information about audio file requirements. -
Select Update to finish. Your selected audio will now play to callers whenever a call is placed on hold.
Your audio file must meet the following specifications:
| Audio file format | Specifications |
|---|---|
| .WAV |
|
| .WMA |
|
| Both .WAV and .WMA |
|
If required, click here to search for online audio conversion sites to find one that best suits you.