Set up your FTTH
Your modem will take care of the hard stuff like internet settings, but we’ll need your help to plug it in. The main cables you need will come in the box, and you can grab extra Ethernet cables from the shops if you need them.
These instructions will work for all TPG FTTH services on the Opticomm network.
Select your modem to get started:
 |
VX420-G2V Modem |
 |
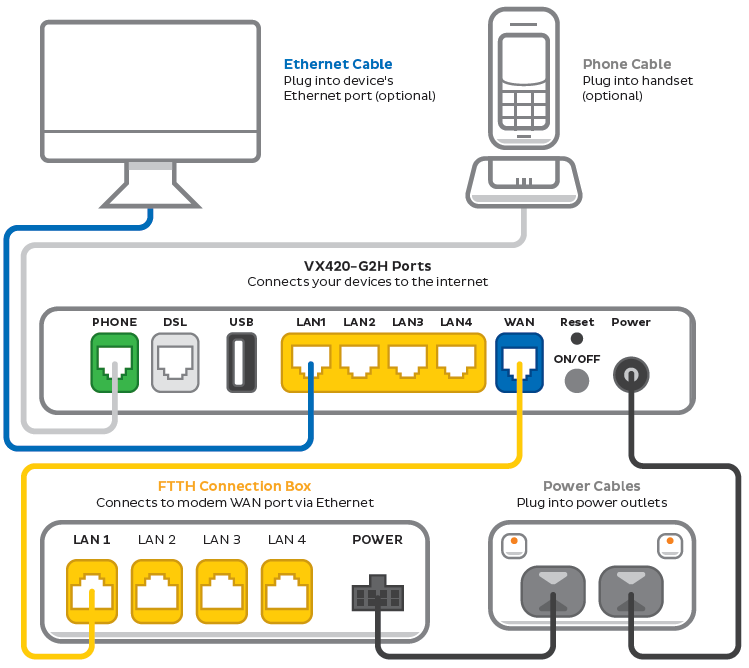
Smart Modem Gateway (VX420-G2H) |
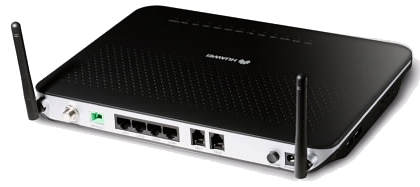
VX420-G2V Modem
- Connect the power cable from your modem's Power Port to an electrical outlet.
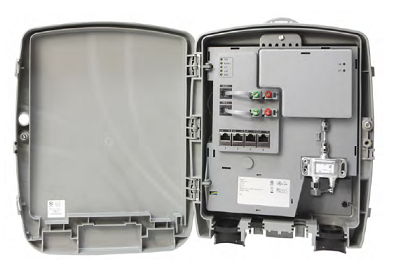
- Find your FTTH Connection Box – this is usually installed on the inside of an exterior wall in your home, sometimes in the garage. Some older installations may be in a cabinet on an outside wall. Examples of connection boxes can be found here.
- Connect the included Ethernet cable from the blue WAN port on your modem to the LAN1 or Ethernet 1 port on your FTTH Connection Box.
- Make sure the electrical outlet for your modem is on, and press the modem's Power button.
- To plug in additional devices via Ethernet cable, simply connect the Ethernet cables to any of the four yellow LAN ports on your modem.
- If you wish to use your TPG Voice phone service, plug a compatible handset into the green Phone port on your modem.
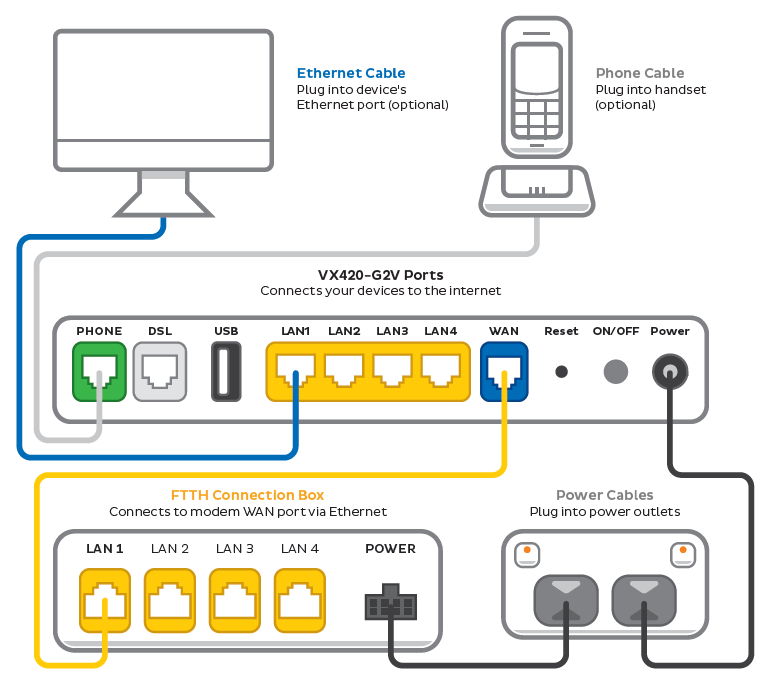
- If you wish to connect your devices via Wi-Fi, you'll find the Wi-Fi name and password on the barcode sticker on the back of your modem.

- Next, it's time to configure your modem settings. On a device that's connected to your modem via Ethernet or Wi-Fi, visit http://192.168.1.1.
- Log in with the default username admin and default password admin, or use your custom login details.
- Select Internet.
- Enter the following settings and hit Save. Allow up to 5 minutes for the new settings to apply.
Username: Your FTTH broadband username (this can be found in emails about your FTTH service)
Password: Your FTTH broadband password (please use our password reset tool if you've forgotten your password)
Confirm Password: Your FTTH broadband password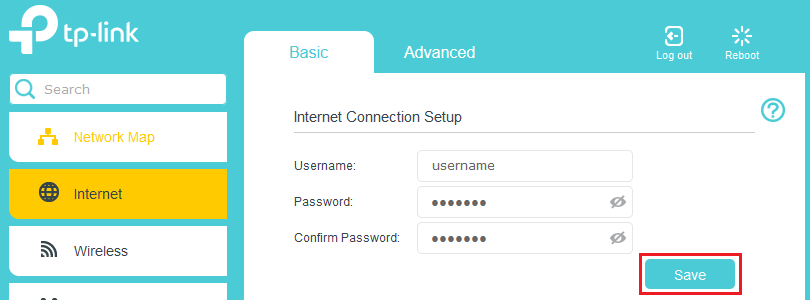
- Check the lights on your modem. If the Internet light is green, you're online!

We recommend connecting over the 5GHz Wi-Fi channel for faster performance. See Improving Wi-Fi Signal.
Smart Modem Gateway (VX420-G2H)
- Connect the power cable from your modem's Power Port to an electrical outlet.
- Find your FTTH Connection Box – this is usually installed on the inside of an exterior wall in your home, sometimes in the garage. Some older installations may be in a cabinet on an outside wall. Examples of connection boxes can be found here.
- Connect the included Ethernet cable from the blue WAN port on your modem to the LAN1 or Ethernet 1 port on your FTTH Connection Box.
- Make sure the electrical outlet for your modem is on, and press the modem's Power button.
- To plug in additional devices via Ethernet cable, simply connect the Ethernet cables to any of the four yellow LAN ports on your modem.
- If you wish to use your TPG Voice phone service, plug a compatible handset into the green Phone port on your modem.
- If you wish to connect your devices via Wi-Fi, you'll find the Wi-Fi name and password on the barcode sticker on the back of your modem.

- Next, it's time to configure your modem settings. On a device that's connected to your modem via Ethernet or Wi-Fi, visit http://192.168.1.1.
- Log in with the default username admin and default password admin, or use your custom login details.
- Select Internet.
- Enter the following settings then hit Save. Allow up to 5 minutes for the new settings to apply.
Username: Your FTTH broadband username (this can be found in emails about your FTTH service)
Password: Your FTTH broadband password (please use our password reset tool if you've forgotten your password)
Confirm Password: Your FTTH broadband password
- Check the lights on your modem. If the Internet light is green, you're online!

We recommend connecting over the 5GHz Wi-Fi channel for faster performance. See Improving Wi-Fi Signal.
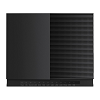
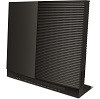
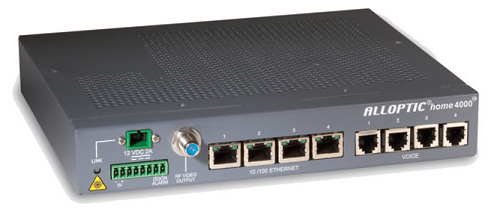
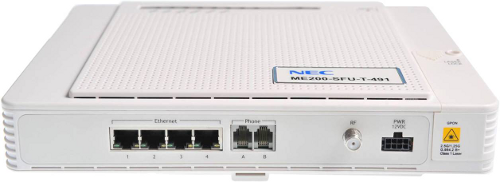
FTTH Connection Box examples
ALLOPTIC home 4000
NEC ME200
Huawei HG8247
Dasan H690R