How to set up Netgear Nighthawk RAX120 for nbn FTTC
You'll need to plug in your modem and change some settings to get it working with TPG nbn FTTC.
- First, make sure you’ve got a message from us asking you to plug in your nbn modem. We need to get your connection ready on our side before you plug in.
- Find your phone wall socket and nbn Connection Box (NCB) – you probably already have a modem plugged in from your last internet service. Unplug any old modem from the NCB and power outlet.
If your NCB is missing, please call us on 1300 023 575. -
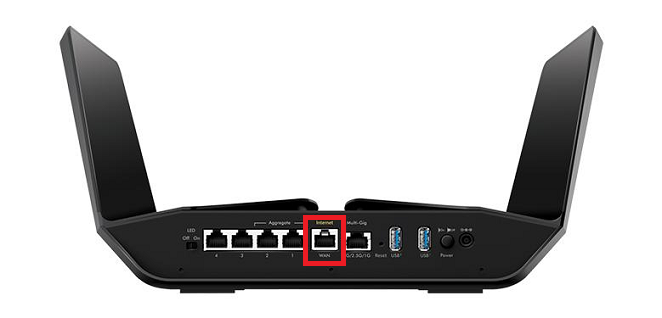
Use the Ethernet cable to connect your modem’s Internet/WAN port to your NCB's yellow Gateway port.
-
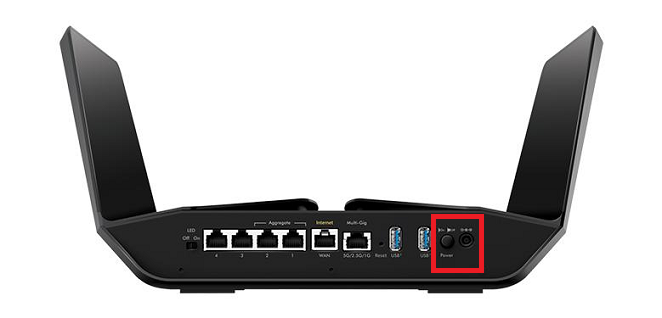
Use the power cable to connect the Power port on your modem to a power outlet. Press your modem's Power button to turn it on.
- To connect devices to the WiFi, you'll find the default WiFi name and password on your modem's barcode sticker.
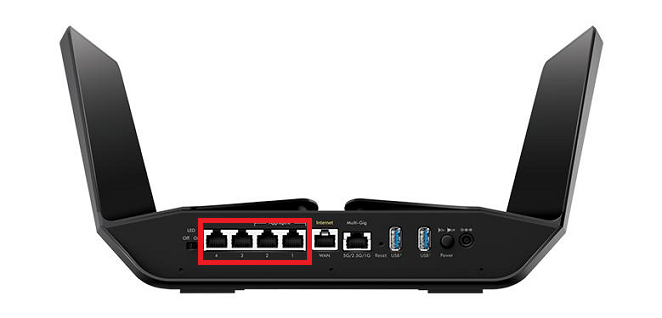
- If you have extra Ethernet cables, you can connect up to 4 devices to your modem’s Ethernet ports.
-
Open your web browser and go to: https://192.168.1.1 or https://www.routerlogin.net
-
Log in with the default username "admin" and the default password "password" on your modem's barcode sticker. If you have custom login details, use those instead.
-
Set WAN Preference to Internet Port.
-
Set Encapsulation to PPPoE (PPP over Ethernet).
-
Enter your TPG username and password.
Your TPG username can be found in emails from us about your TPG order. If you've forgotten your password, reset your password. -
Hit Apply.
-
If you have a bundled nbn & phone plan: Select Advanced > Advanced Setup > VLAN/Bridge Settings, and tick the box for VLAN/Bridge Setup. Select By VLAN tag group, hit Add and enter a Name, e.g. "TPG". Set VLAN ID to 2 and Priority to 0, then hit Add.
-
Hit Apply and you're good to go.
Can't get online? Call us on 1300 997 271 and we'll help you.