How to manually set your DNS server
In most cases, your computer will get your DNS settings automatically. DNS may need to be set manually if you're having some browsing issues.
Select one of the links below to jump to a query:
Set DNS server in Windows
-
Log in to Windows with an Administrator account.
If your account doesn’t have Administrator privileges, you can't change your DNS server settings. -
Hit Search and search for "Control Panel".
-
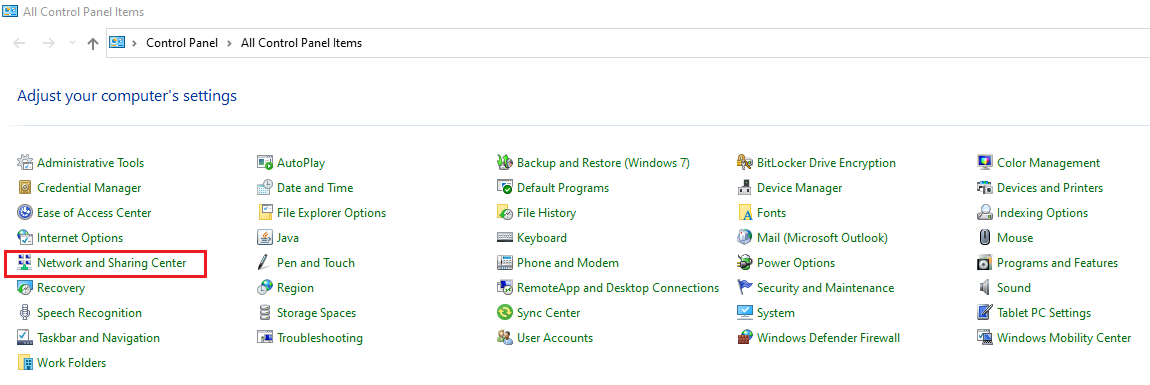
Open the Control Panel app and select Network and Sharing Centre.
You may need to hit Network and Internet before you see Network and Sharing Centre. -
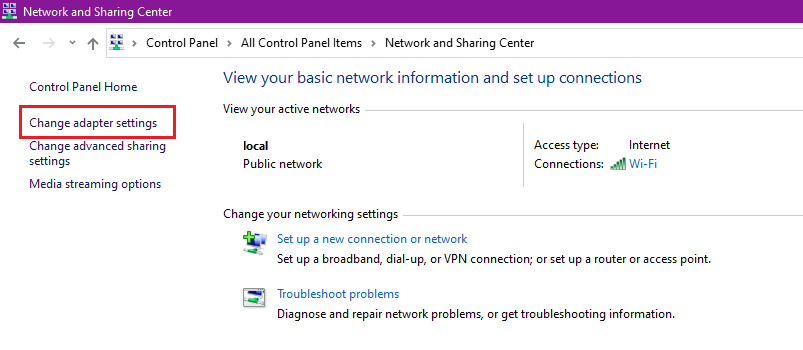
Hit Change adapter settings.
-
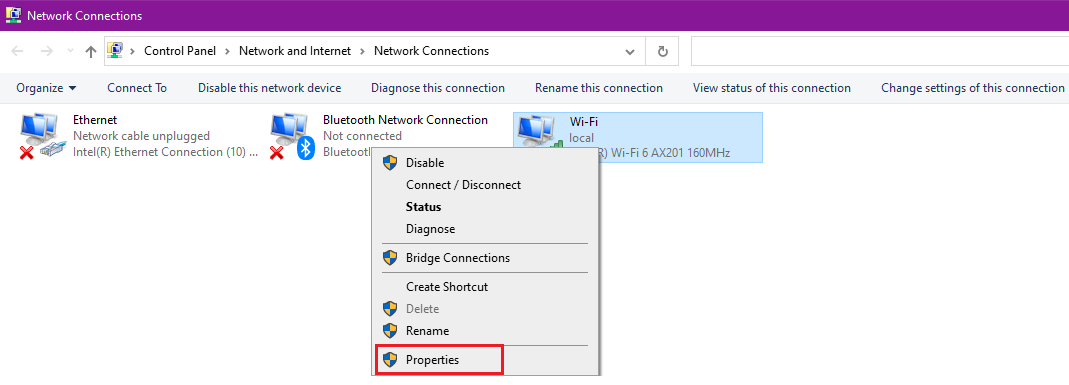
Right-click on your active internet connection and select Properties.
Your active internet connection may be Ethernet, Wireless Network Connection or Local Area Connection depending on how your computer is set up. -
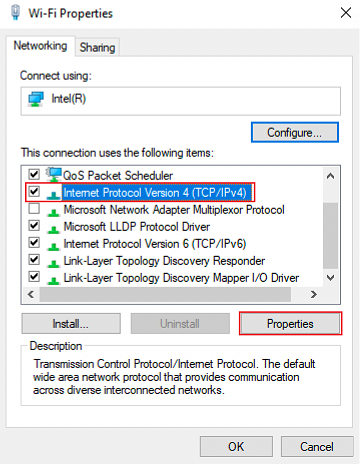
In the Networking tab, select Internet Protocol (TCP/IP), then hit Properties.
-
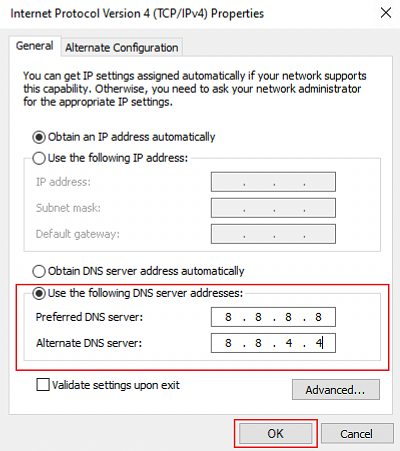
Select Use the following DNS server addresses and enter these settings:
Preferred DNS server: 203.12.160.35
Alternate DNS server: 203.12.160.36 -
Hit OK to finish.
Set DNS server in macOS
-
Hit the Apple icon in the top right-hand corner and select System Preferences.
-
Select Network.
-
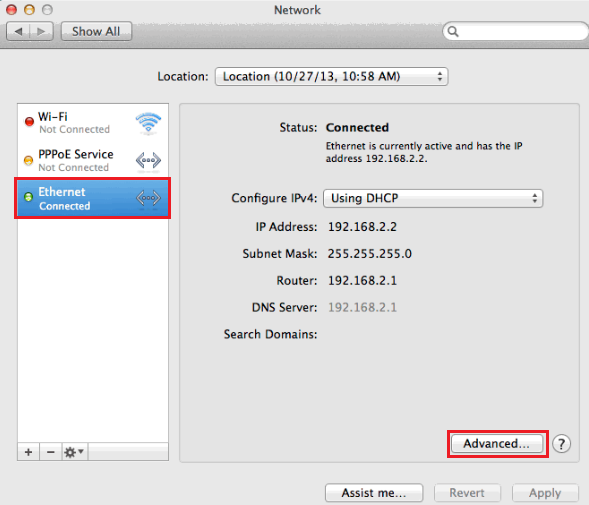
Select your connected network (Ethernet or Wi-Fi) and then hit Advanced.
-
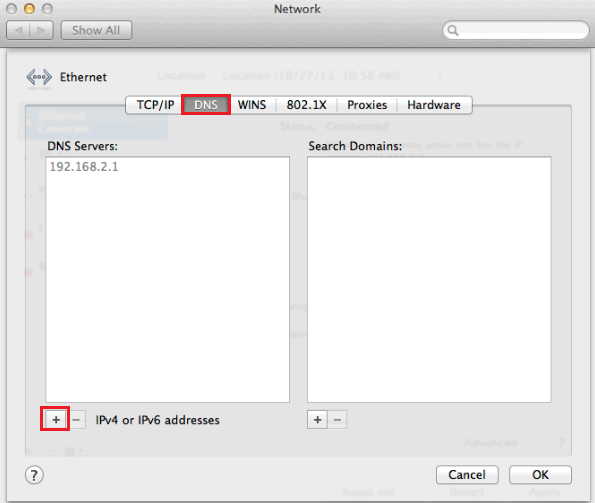
Select the DNS tab and then click the plus (+) icon in the lower left-hand corner.
-
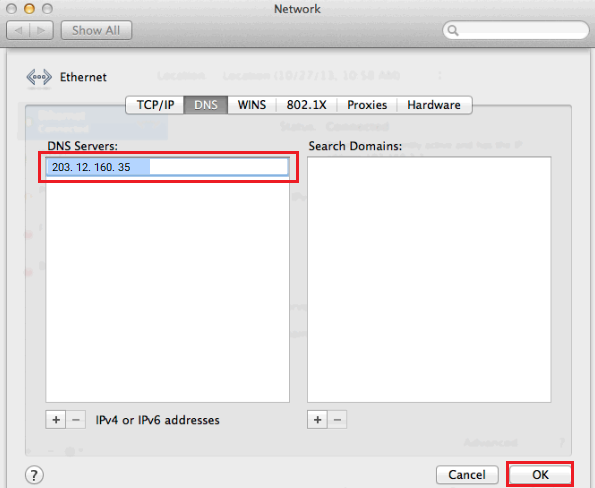
For DNS Servers, enter "203.12.160.35" and then hit OK to finish.
