BizPhone Schedules and Events setup
Schedules and Events allows you to configure the following schedules for your BizPhone service:
- Business Hours schedules are set from business open to close, e.g. 9AM to 5PM.
- After Hours schedules are set outside of business hours. They should be split into AM (midnight to business open) and PM (business closed to midnight) events when created, e.g. 12AM to 8:59AM and 5:01PM to 11:59PM. It's also possible to create separate Weekend events.
- Holiday schedules are set for specific Public Holidays or holiday periods. While a holiday schedule is active, the Auto Attendant or Hunt Group performs After Hours or Busy treatment.
These schedules are used in a range of other BizPhone features, such as Auto Attendant, call forwarding and more.
Select one of the links below to jump to a query:
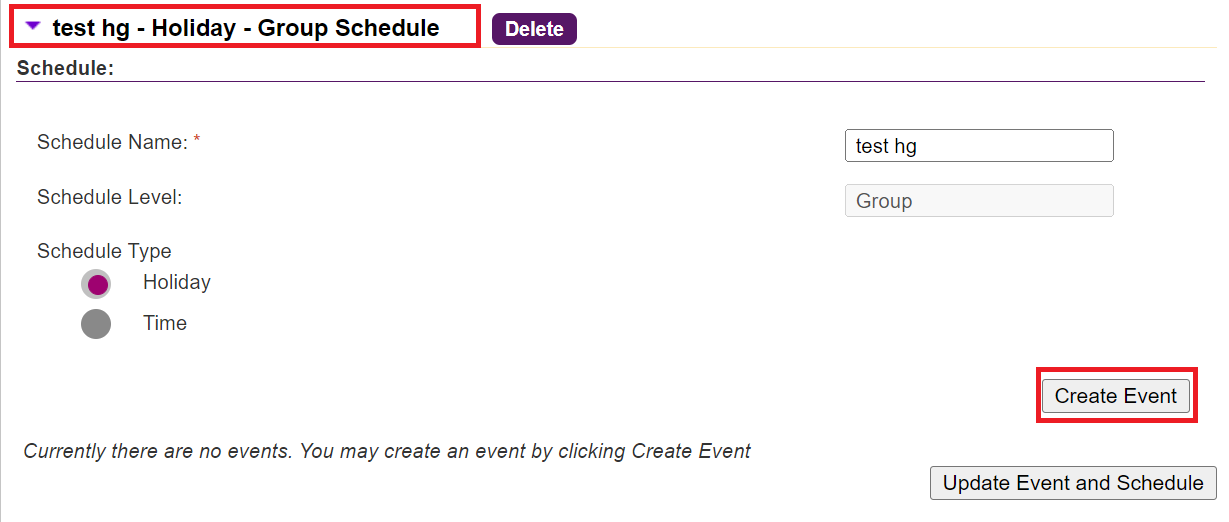
Creating a Schedule
-
Log in to Frontier Portal. If you have never logged in before, please watch this video.
-
Select the arrow next to Schedules and Events to expand the options.

-
Under "Create Schedule", enter a Schedule Name.
-
Select a Schedule Type:
- Time should be used for a Business Hours Schedule or After Hours Schedule.
- Holiday should be used for a Holiday Schedule.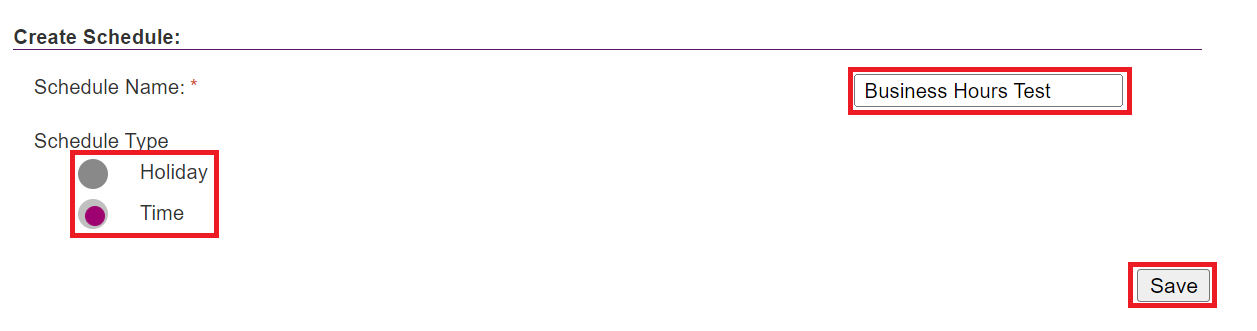
-
Select Save to finish.
Business Hours/After Hours Events
-
Log in to Frontier Portal. If you have never logged in before, please watch this video.
-
Select the arrow next to Schedules and Events to expand the options.
-
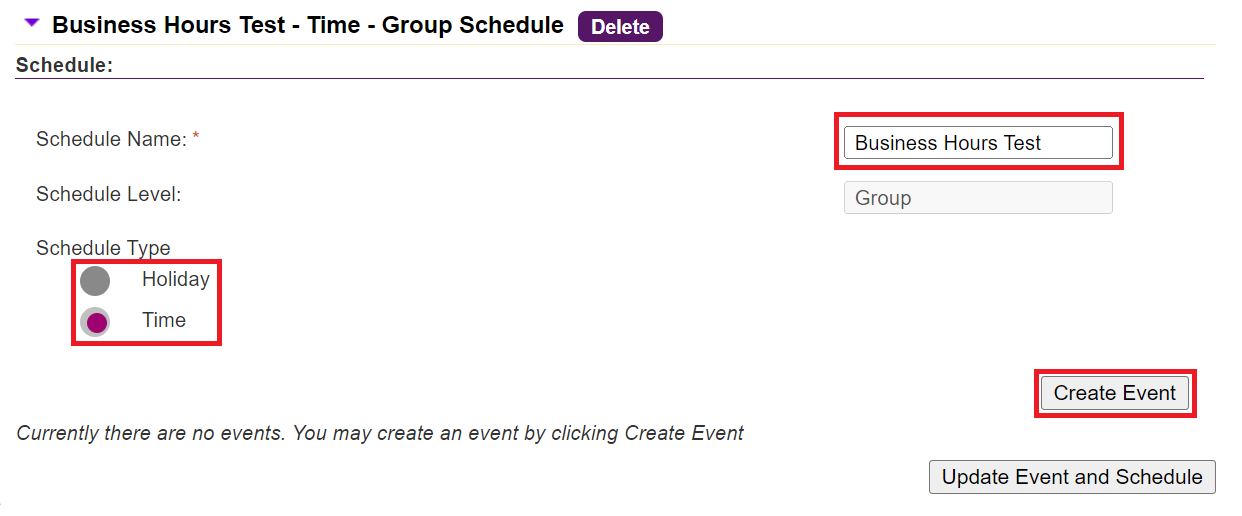
Select the desired schedule to expand the options, then select Create Event.
-
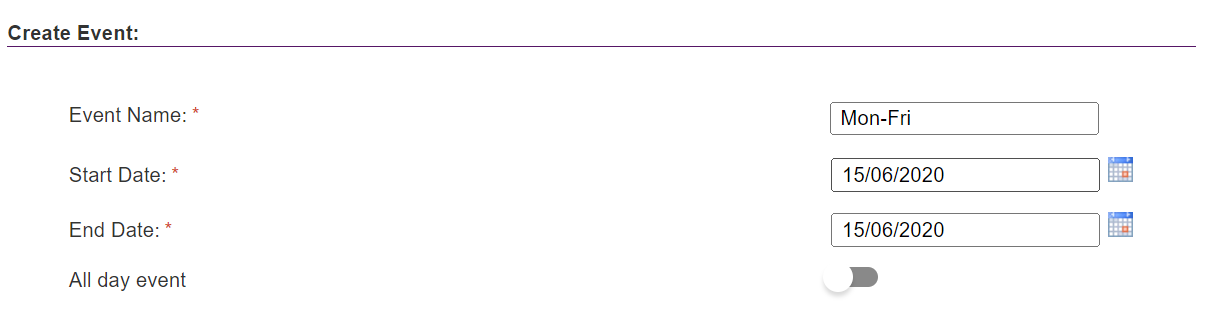
Enter an Event Name. We recommend you include the days the event applies to, e.g. "Mon-Fri" for a Business Hours event.
Note: If creating an After Hours event, specify if this is the AM, PM or Weekend event. -
Enter today's date as both the Start Date and End Date, and ensure the All day event switch is set to OFF (unless you are creating an After Hours Weekend event, then keep it ON).
-
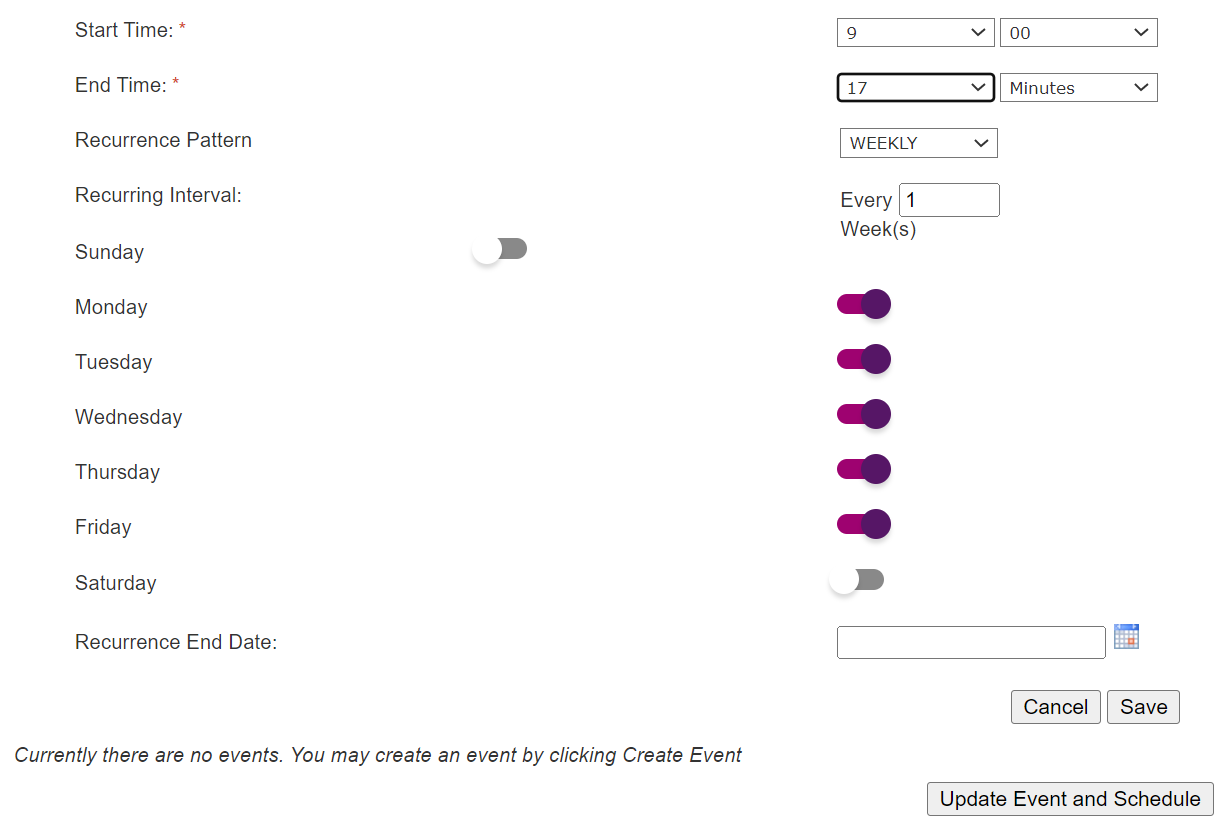
Enter a Start Time and an End Time in 2400 hour time, e.g. 900 to 1700.
Note: If All day event is ON, enter random numbers for start and end time - these fields cannot be left blank. -
Select a Recurrence Pattern - Weekly is the most common.
-
Set the Recurrence Interval to 1.
-
Turn ON the switches for each day of the week you want the event to apply for.
-
Leave Recurrence End Date blank if you want the event to continue indefinitely, otherwise specify an end date.
-
Select Save.
-
Select Update Event and Schedule to finish.
Holiday Events
-
Log in to Frontier Portal. If you have never logged in before, please watch this video.
-
Select the arrow next to Schedules and Events to expand the options.
-
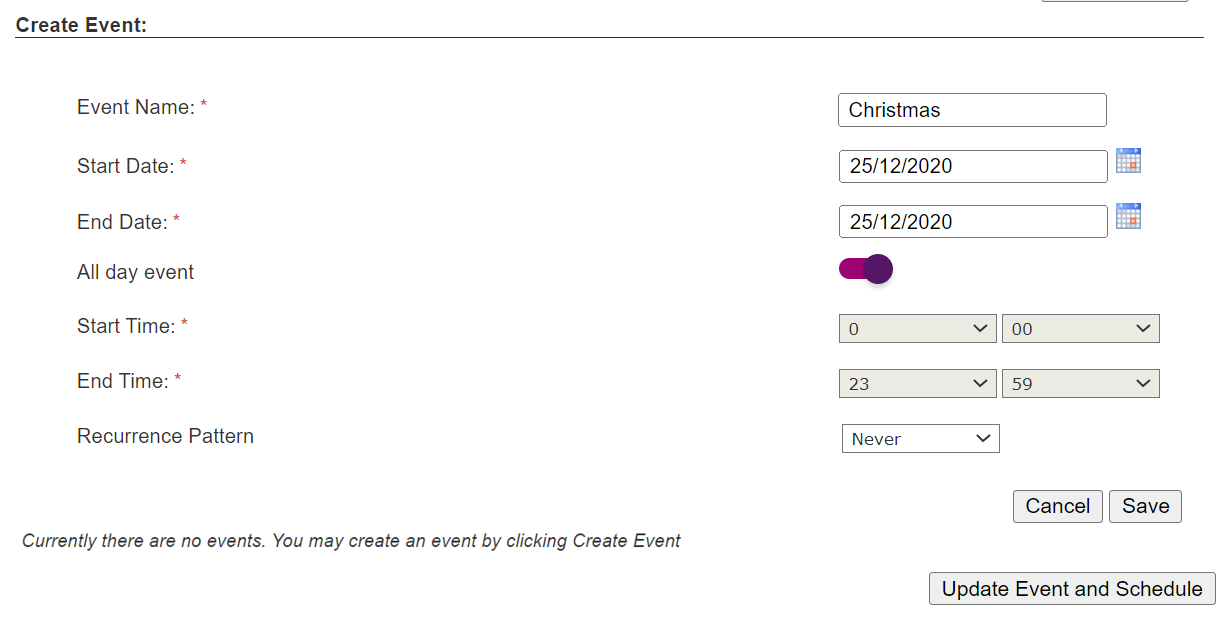
Select the desired schedule to expand the options, then select Create Event.
-
Enter an Event Name, e.g. "Christmas".
-
Enter the Start Date and End Date for the holiday period.
-
Ensure the All day event switch is set to ON.
-
Enter random numbers for Start Time and End Time - these fields cannot be left blank.
-
Set the desired Recurrence Pattern. We recommend you set this to "Never" for holidays which change dates each year, such as the Easter holidays.
-
Select Save.
-
Select Update Event and Schedule to finish.